Plymouth theming guide (part 2)
The first part of guide showed how to set up the system to be able to view plymouth themes and make simple adjustments to ones that are already present. This part will show how to make a custom theme, without delving down to the level of writing C.
One of my targets for this year was to add a simple way of designing themes without having to worry about many low level aspects (redrawing parts of the screen, keeping pointers to all elements to free them etc). The scripting language allows the designer to get stuck into the design, while the system is already optimised to take care of and minimise the areas to be refreshed. It is now quite stable and this is the method used by Mandriva for their default themes.
The following walk-though will show you how to make a small example splash. This part should be very easy and even if you have never programmed before, you should have no problems. First download and install the template:
wget -O /tmp/mytheme.tar.gz http://brej.org/blog/wp-content/uploads/2009/12/mytheme.tar.gz
cd /usr/share/plymouth/themes/
tar xzf /tmp/mytheme.tar.gz
Now the theme is installed, and you already have a system set up like explained in part 1, you can switch to it:
plymouth-set-default-theme mytheme
and then test it:
plymouthd --debug --debug-file=/tmp/plymouth-debug-out ; plymouth --show-splash ; for ((I=0;I<10;I++)); do sleep 1 ; plymouth --update=event$I ; done ; plymouth --quit
Notice this time some debug information is generated and the file /tmp/plymouth-debug-out contains more. The debug information is useful to find any syntax errors in your script. It is a good idea to keep a text editor with this file open and revert to saved after every execution to watch for any errors. A syntax error contains the line and column number of the expression like so:
Parser error "/usr/share/plymouth/themes/mytheme/mytheme.script" L:8 C:42 : Expected ';' after an expression
In the mytheme directory there is a file named mytheme.script. Open this using your favourite text editor. At the top of the example script, there are some lines which create the theme, and below this are sections which control the password dialogue, progress bar etc. You should leave things below the dialogue line alone for now.
Lines starting with # are comments, so lets skip to the first two executed lines:
flower_image = Image("flower.png");
flower_sprite = Sprite(flower_image);
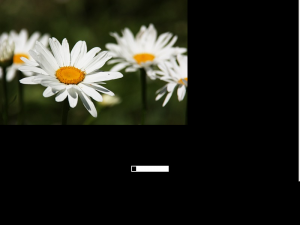
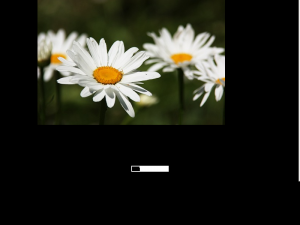
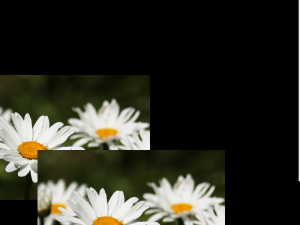
In the mytheme directory, you will notice some images. One of these is flower.png (from Nicu CC-BY-SA), which the first line loads. The loaded image is assigned to flower_image, which can then be used by sprites. A sprite is an image with a position on the screen. The second line creates a sprite using the flower image. By default this is placed at X=0, Y=0, which is the top left of the screen. To change the position of the sprite use the SetX and SetY functions on the sprite. Adding the following line will move the sprite to 100 pixels to the right.
flower_sprite.SetX(100);
In a similar way, setting the Y position will move the image down the screen.
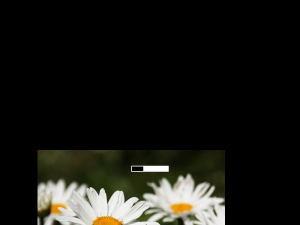
flower_sprite.SetY(400);
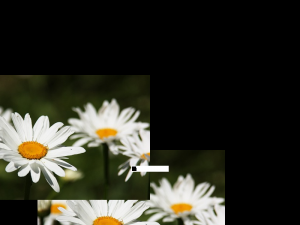
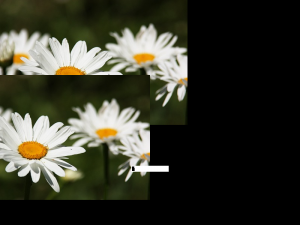
Notice there is no problem if the sprite runs off the edge of the screen. Also notice how the progress bar is on top of the flower sprite. The sprites have a defined order of which is on top. To demonstrate this, lets add another sprite. You can reuse the flower image and place it overlapping with the original flower sprite.
other_flower_sprite = Sprite(flower_image);
other_flower_sprite.SetX(-100);
other_flower_sprite.SetY(200);
Negative coordinates are acceptable. The new sprite will be placed on top of the previous one. To override this, each sprite has a Z value. The higher the Z value, the higher up the stack the sprite is (drawn on top of others). To place the original flower sprite on top you set its Z value to be higher. The default Z value is 0, and you can set it using SetZ.
flower_sprite.SetZ(10);
Now not only is the original the sprite above the other, it is also above the progress bar, which also has the Z value set to 0. In general, wallpapers should have Z set to high negative values to force them to the very back and the password dialogue has a Z value of 10000 to place it on top of any theme components. Thus, make sure you don’t place any sprites higher than 10000, otherwise you may find it difficult to type in your password.
Lets take the sprite back to the background and reposition it. Often you want to set X, Y and Z at the same time. This can be done using the SetPosition function.
flower_sprite.SetPosition(0, 0, -10000);
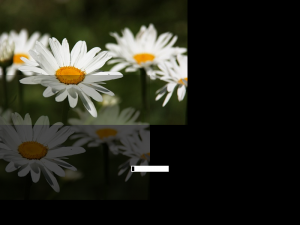
As well as the X, Y and Z values, the sprite also has opacity. The default setting of 1 makes the sprite solid. Values between 0 and 1 make the sprite partly transparent. This can be set using SetOpacity.
other_flower_sprite.SetOpacity(0.3);
Setting this to 0 will make the sprite invisible. This should return the display the original setup.
other_flower_sprite.SetOpacity(0);
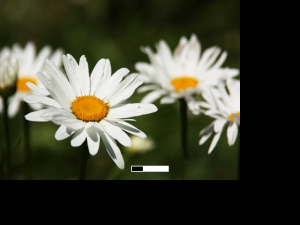
The image of the flowers is very nice, but it is the wrong shape and size. You could distribute an image for every possible screen resolution, but this would be terribly space consuming. Instead you can scale the image to suit your needs. A new scaled image can be created using Scale and to change the image the sprite is showing, use SetImage.
resized_flower_image = flower_image.Scale(640, 480);
flower_sprite.SetImage(resized_flower_image);
Here the image is scaled to 640×480, but this is not the screen resolution. For now, assume there is only one monitor connected (I will explain more about this later). To get the width and height of the screen, use Window.GetWidth() and Window.GetHeight(). You can use these to scale the image to the screen dimensions.
screen_width = Window.GetWidth();
screen_height = Window.GetHeight();
resized_flower_image = flower_image.Scale(screen_width, screen_height);
flower_sprite.SetImage(resized_flower_image);
Now the image is scaled to cover the whole screen, but is the wrong aspect ratio (although that is difficult to see in this example). Correcting this will require some programming which will be shown in the next part of the guide.

I know it is not directly related to the topic, but do you think is any possibility (I expect to not be easy) for a Plymouth theme to get the default background (the background used by GDM) and use that? From an usage point of view, that would be my ideal boot setup: just after GRUB the background image is loaded and it stays the same until the desktop is fully loaded, with small indicators: a progress bar during the init, a login box in GDM and ultimately panels and icons.
Since you pointed to that, in the next part, I showed how to do this. It is not automatic because from the initrd it is impossible to get access to the background image. But doing it my hand isn’t too difficult.
The point is not to do it by hand… I don’t know, maybe have the “make default” button in the GNOME background chooser change the Plymouth theme?
That would be difficult for the time being as it would require a rebuild of the initrd (a priveliged task). Maybe if there are as many themes as screensavers, there may be a desire to have a graphical chooser which can negotiate doing such restricted tasks.
Changing the default GDM background is a privileged task anyway.
nicu:
I’ve opened a bug about it: https://bugzilla.redhat.com/show_bug.cgi?id=550321
thank you so much
Hey guy!
I was reading your plymouth guide but i have to say its really complicated for me because all is in english!
I am makin an own little Distro for musicians and want to make a simple plymouth without any logo just a status-loading-bar!
So i have a really nice plymouth of linux mint (and my distro is based on linux mint) but i want to use it without the Linux Mint-logo- just with the green status-bar loading! I send you the original mint-script and maybe you can show me in some easy ways how to configure the script just showing this green on black loading bar? this would be a really nice help to understand how it works! And makes me finishing my secial Distro!
Thanx for helping!!! best regards, chalee
script:
# mint-logo.script – boot splash plugin
# Set the text colour in (rgb / 256)
text_colour.red = 1.0;
text_colour.green = 1.0;
text_colour.blue = 1.0;
# Tinted text #aacd67
tinted_text_colour.red = 0.66;
tinted_text_colour.green = 0.80;
tinted_text_colour.blue = 0.40;
# Action Text – #ffffff – RGB 255 255 255
action_text_colour.red = 1.0;
action_text_colour.green = 1.0;
action_text_colour.blue = 1.0;
# Orange – #ff4012 – RGB 255 64 18
debugsprite = Sprite();
debugsprite_bottom = Sprite();
debugsprite_medium = Sprite();
# are we currently prompting for a password?
prompt_active = 0;
# General purpose function to create text
fun WriteText (text, colour) {
image = Image.Text (text, colour.red, colour.green, colour.blue);
return image;
}
fun ImageToText (text) {
image = WriteText (text, text_colour);
return image;
}
fun ImageToTintedText (text) {
image = WriteText (text, tinted_text_colour);
return image;
}
fun ImageToActionText (text) {
image = WriteText (text, action_text_colour);
return image;
}
fun Debug(text) {
debugsprite.SetImage(ImageToText (text));
}
fun DebugBottom(text) {
debugsprite_bottom.SetImage(ImageToText (text));
debugsprite_bottom.SetPosition(0, (Window.GetHeight (0) – 20), 1);
}
fun DebugMedium(text) {
debugsprite_medium.SetImage(ImageToText (text));
debugsprite_medium.SetPosition(0, (Window.GetHeight (0) – 60), 1);
}
fun TextYOffset() {
local.y;
local.text_height;
local.min_height;
# Put the 1st line below the logo + some spacing
y = logo.y + logo.height + (progress_indicator.bullet_height * 7 ); # + logo_spacing;
text_height = first_line_height * 7.5;
min_height = Window.GetHeight();
if (y + text_height > min_height)
y = min_height – text_height;
if (y < progress_indicator.y + progress_indicator.height)
return progress_indicator.y + progress_indicator.height;
return y;
}
#——————————String functions——————————-
# This is the equivalent for strstr()
fun StringString(string, substring) {
start = 0;
while (String(string).CharAt (start)) {
walk = 0;
while (String(substring).CharAt (walk) == String(string).CharAt (start + walk) ) {
walk++;
if (!String(substring).CharAt (walk)) return start;
}
start++;
}
return NULL;
}
fun StringLength (string) {
index = 0;
while (String(string).CharAt(index)) index++;
return index;
}
fun StringCopy (source, beginning, end) {
local.destination = "";
for (index = beginning; ( ( (end == NULL) || (index <= end) ) && (String(source).CharAt(index)) ); index++) {
local.destination += String(source).CharAt(index);
}
return local.destination;
}
fun StringReplace (source, pattern, replacement) {
local.found = StringString(source, pattern);
if (local.found == NULL)
return source;
local.new_string = StringCopy (source, 0, local.found – 1) +
replacement +
StringCopy (source, local.found + StringLength(pattern), NULL);
return local.new_string;
}
# it makes sense to use it only for
# numbers up to 100
fun StringToInteger (str) {
int = -1;
for (i=0; i 0.19, 0.04, 0.14
# New background colour
# #2c001e –> 0.16, 0.00, 0.12
#
# New mint background
# 0.00, 0.09, 0.17
Window.SetBackgroundTopColor (0.00, 0.00, 0.00); # Nice colour on top of the screen fading to
Window.SetBackgroundBottomColor (0.00, 0.00, 0.00); # an equally nice colour on the bottom
logo.image = Image (“mint_logo.png”); # “special://logo” is a special keyword which finds the logo image
logo.sprite = Sprite ();
logo.sprite.SetImage (logo.image);
logo.width = logo.image.GetWidth ();
logo.height = logo.image.GetHeight ();
logo.x = Window.GetX () + Window.GetWidth () / 2 – logo.width / 2;
logo.y = Window.GetY () + Window.GetHeight () / 2 – logo.height;
logo.z = 1000;
logo.sprite.SetX (logo.x);
logo.sprite.SetY (logo.y);
logo.sprite.SetZ (logo.z);
logo.sprite.SetOpacity (1);
# Spacing below the logo – in pixels
logo_spacing = logo.height * 4;
message_notification[0].image = ImageToTintedText (“”);
message_notification[1].image = ImageToTintedText (“”);
fsck_notification.image = ImageToActionText (“”);
status = “normal”;
progress_indicator.bullet_off = Image (“progress_dot_off.png”);
progress_indicator.bullet_on = Image (“progress_dot_on.png”);
progress_indicator.bullet_width = progress_indicator.bullet_off.GetWidth ();
progress_indicator.bullet_height = progress_indicator.bullet_off.GetHeight ();
progress_indicator.bullet_hspacing = progress_indicator.bullet_width * 1.1;
progress_indicator.width = progress_indicator.bullet_width * 5;
progress_indicator.height = progress_indicator.bullet_height;
progress_indicator.y = logo.y + logo.height + (logo.height / 4);
progress_indicator.x = Window.GetX () + Window.GetWidth () / 2 – progress_indicator.width / 2; # logo.x + 26;
# use a fixed string with ascending and descending stems to calibrate the
# bounding box for the first message, so the messages below don’t move up
# and down according to *their* height.
first_line_height = ImageToTintedText (“AfpqtM”).GetHeight();
# if the user has a 640×480 or 800×600 display, we can’t quite fit everything
# (including passphrase prompts) with the target spacing, so scoot the text up
# a bit if needed.
top_of_the_text = TextYOffset();
#—————————————–Logo functions——————————
# Call this when updating the screen
fun draw_logo () {
logo.sprite.SetX (logo.x);
logo.sprite.SetY (logo.y);
logo.sprite.SetZ (logo.z);
logo.sprite.SetOpacity (1);
}
#—————————————–Progress Indicator————————–
fun set_progress_indicator () {
# Here we assume that we can store half bullets on each half of the screen
# together with some spacing
local.x = progress_indicator.x;
for (index = 0; index = 1.0) {
global.progress_time = progress;
if (global.times_bullets_switched == 5) {
# Change which bullets are switched on
# and which ones are switched off
global.on_off = !global.on_off;
global.times_bullets_switched = 0;
}
if (global.on_off) {
switch_on_bullet (progress_indicator.bullets_off, progress_indicator.bullets_on,
global.times_bullets_switched, 1.0);
}
else {
switch_on_bullet (progress_indicator.bullets_on, progress_indicator.bullets_off,
global.times_bullets_switched, 1.0);
}
}
# Start setting bullets to “on” with translucency
# for (index = 0; index <= 5; index++) {
# opacity = 0.0;
# while (opacity spaces)
bullets = spaces;
for (index = 0; password_dialogue.bullets[index] || index < bullets; index++){
if (!password_dialogue.bullets[index]) {
password_dialogue.bullets[index].sprite = Sprite ();
password_dialogue.bullets[index].sprite.SetImage (password_dialogue.bullet_image);
password_dialogue.bullets[index].x = bullets_area.x + # password_dialogue.entry.x + margin +
index * bullet_width / 2;
password_dialogue.bullets[index].sprite.SetX (password_dialogue.bullets[index].x);
password_dialogue.bullets[index].y = bullet_y;
password_dialogue.bullets[index].sprite.SetY (password_dialogue.bullets[index].y);
password_dialogue.bullets[index].z = password_dialogue.entry.z + 1;
password_dialogue.bullets[index].sprite.SetZ (password_dialogue.bullets[index].z);
}
password_dialogue.bullets[index].sprite.SetOpacity (0);
if (index show
# opacity = 0 -> hide
# opacity = 0.3 (or any other float) -> translucent
#
fun set_progress_label_opacity (opacity) {
# the label
progress_label.sprite.SetOpacity (opacity);
# Make the slot available again when hiding the bar
# So that another bar can take its place
if (opacity == 0) {
progress_label.is_available = 1;
progress_label.device = “”;
}
}
# Set up a new Progress Bar
#
# TODO: Make it possible to reuse (rather than recreate) a bar
# if .is_available = 1. Ideally this would just reset the
# label, the associated
# device and the image size of the sprite.
fun init_progress_label (device, status_string) {
# Make the slot unavailable
global.progress_label.is_available = 0;
progress_label.progress = 0;
progress_label.device = device;
progress_label.status_string = status_string;
}
# See if the progress label is keeping track of the fsck
# of “device”
#
fun device_has_progress_label (device) {
#DebugBottom (“label device = ” + progress_label.device + ” checking device ” + device);
return (progress_label.device == device);
}
# Update the Progress bar which corresponds to index
#
fun update_progress_label (progress) {
# If progress is NULL then we just refresh the label.
# This happens when only counter.total has changed.
if (progress != NULL) {
progress_label.progress = progress;
#Debug(“device ” + progress_label.device + ” progress ” + progress);
# If progress >= 100% hide the label and make it available again
if (progress >= 100) {
set_progress_label_opacity (0);
# See if we any other fsck check is complete
# and, if so, hide the progress bars and the labels
on_fsck_completed ();
return 0;
}
}
# Update progress label here
#
# FIXME: the queue logic from this theme should really be moved into mountall
# instead of using string replacement to deal with localised strings.
label = StringReplace (progress_label.status_string[0], “%1$d”, global.counter.current);
label = StringReplace (label, “%2$d”, global.counter.total);
label = StringReplace (label, “%3$d”, progress_label.progress);
label = StringReplace (label, “%%”, “%”);
progress_label = get_fsck_label (label, 0);
#progress_label.progress = progress;
progress_label.sprite = Sprite (progress_label.image);
# Set up the bar
progress_label.sprite.SetPosition(progress_label.x, progress_label.y, 1);
set_progress_label_opacity (1);
}
# Refresh the label so as to update counters
fun refresh_progress_label () {
update_progress_label (NULL);
}
#—————————————– FSCK Queue ———————————-
# Initialise the fsck queue
fun init_queue () {
global.fsck_queue[0].device;
global.fsck_queue[0].progress;
global.fsck_queue.counter = 0;
global.fsck_queue.biggest_item = 0;
}
fun clear_queue () {
global.fsck_queue = NULL;
init_queue ();
}
# Return either the device index in the queue or -1
fun queue_look_up_by_device (device) {
for (i=0; i global.fsck_queue.biggest_item)
global.fsck_queue.biggest_item = local.index;
#DebugMedium (“Adding ” + device + ” at ” + local.index);
}
fun is_queue_empty () {
return (fsck_queue.counter == 0);
}
fun is_progress_label_available () {
return (progress_label.is_available == 1);
}
# This should cover the case in which the fsck checks in
# the queue are completed before the ones showed in the
# progress label
fun on_queued_fsck_completed () {
if (!is_queue_empty ())
return;
# Hide the extra label, if any
#if (progress_bar.extra_label.sprite)
# progress_bar.extra_label.sprite.SetOpacity(0);
}
fun remove_fsck_from_queue (index) {
# Free memory which was previously allocated for
# device and progress
global.fsck_queue[index].device = NULL;
global.fsck_queue[index].progress = NULL;
# Decrease the queue counter
global.fsck_queue.counter–;
# See if there are other processes in the queue
# if not, clear the extra_label
on_queued_fsck_completed ();
}
fun on_fsck_completed () {
# We have moved on to tracking the next fsck
increase_current_fsck_count ();
if (!is_progress_label_available ())
return;
if (!is_queue_empty ())
return;
# Hide the progress label
if (progress_label.sprite)
progress_label.sprite.SetOpacity (0);
# Clear the queue
clear_queue ();
# Clear the fsck counter
clear_fsck_count ();
}
# Update an fsck process that we keep track of in the queue
fun update_progress_in_queue (index, device, progress) {
# If the fsck is complete, remove it from the queue
if (progress >= 100) {
remove_fsck_from_queue (index);
on_queued_fsck_completed ();
return;
}
global.fsck_queue[index].device = device;
global.fsck_queue[index].progress = progress;
}
# TODO: Move it to some function
# Create an empty queue
#init_queue ();
#—————————————– FSCK Functions ——————————
# Either add a new bar for fsck checks or update an existing bar
#
# NOTE: no more than “progress_bar.max_number” bars are allowed
#
fun fsck_check (device, progress, status_string) {
# The 1st time this will take place
if (!global.progress_label) {
# Increase the fsck counter
increase_fsck_count ();
# Set up a new label for the check
init_progress_label (device, status_string);
update_progress_label (progress);
return;
}
if (device_has_progress_label (device)) {
# Update the progress of the existing label
update_progress_label (progress);
}
else {
# See if there’s already a slot in the queue for the device
local.queue_device_index = queue_look_up_by_device(device);
# See if the progress_label is available
if (progress_label.is_available) {
# local.my_string = “available index ” + local.available_index + ” progress_bar counter is ” + progress_bar.counter;
# Debug(local.my_string);
# If the fsck check for the device was in the queue, then
# remove it from the queue
if (local.queue_device_index >= 0) {
remove_fsck_from_queue (index);
}
else {
# Increase the fsck counter
increase_fsck_count ();
}
# local.my_string += local.message;
#Debug(“setting new label for device ” + device + ” progress ” + progress);
# Set up a new label for the check
init_progress_label (device, status_string);
update_progress_label (progress);
}
# If the progress_label is not available
else {
# If the fsck check for the device is already in the queue
# just update its progress in the queue
if (local.queue_device_index >= 0) {
#DebugMedium(“Updating queue at ” + local.queue_device_index + ” for device ” + device);
update_progress_in_queue (local.queue_device_index, device, progress);
}
# Otherwise add the check to the queue
else {
#DebugMedium(“Adding device ” + device + ” to queue at ” + local.queue_device_index);
add_fsck_to_queue (device, progress);
# Increase the fsck counter
increase_fsck_count ();
refresh_progress_label ();
}
}
}
# if (!is_queue_empty ()) {
# DebugBottom(“Extra label for “+ device);
#}
# else {
# DebugBottom(“No extra label for ” + device + “. 1st Device in the queue “+ fsck_queue[0].device + ” counter = ” + global.fsck_queue.counter);
# }
}
#—————————————–Update Status stuff ————————–
#
# The update_status_callback is what we can use to pass plymouth whatever we want so
# as to make use of features which are available only in this program (as opposed to
# being available for any theme for the script plugin).
#
# Example:
#
# Thanks to the current implementation, some scripts can call “plymouth –update=fsck:sda1:40”
# and this program will know that 1) we’re performing and fsck check, 2) we’re checking sda1,
# 3) the program should set the label progress to 40%
#
# Other features can be easily added by parsing the string that we pass plymouth with “–update”
#
fun update_status_callback (status) {
# Debug(status);
if (!status) return;
string_it = 0;
update_strings[string_it] = “”;
for (i=0; (String(status).CharAt(i) != “”); i++) {
local.temp_char = String(status).CharAt(i);
if (temp_char != “:”)
update_strings[string_it] += temp_char;
else
update_strings[++string_it] = “”;
}
# my_string = update_strings[0] + ” ” + update_strings[1] + ” ” + update_strings[2];
# Debug(my_string);
# Let’s assume that we’re dealing with these strings fsck:sda1:40
if ((string_it >= 2) && (update_strings[0] == “fsck”)) {
device = update_strings[1];
progress = update_strings[2];
status_string[0] = update_strings[3]; # “Checking disk %1$d of %2$d (%3$d %% complete)”
if (!status_string[0])
status_string[0] = “Checking disk %1$d of %2$d (%3$d %% complete)”;
if ((device != “”) && (progress != “”)) {
progress = StringToInteger (progress);
# Make sure that the fsck_queue is initialised
if (!global.fsck_queue)
init_queue ();
# Make sure that the fsck counter is initialised
if (!global.counter)
init_fsck_count ();
# if (!global.progress_bar.extra_label.sprite)
# create_extra_fsck_label ();
# Keep track of the fsck check
fsck_check (device, progress, status_string);
}
}
}
Plymouth.SetUpdateStatusFunction (update_status_callback);
#—————————————–Display Question stuff ———————–
#
# TODO: Implement this if needed
#
# The callback function is called when the display should display a question dialogue.
# First arg is prompt string, the second is the entry contents.
#fun display_question_callback (prompt_string, entry_contents)
#{
# time++;
#}
#
#Plymouth.SetDisplayQuestionFunction (display_question_callback);
#—————————————–Refresh stuff ——————————–
#
# Calling Plymouth.SetRefreshFunction with a function will set that function to be
# called up to 50 times every second, e.g.
#
# NOTE: if a refresh function is not set, Plymouth doesn’t seem to be able to update
# the screen correctly
#
fun refresh_callback ()
{
draw_logo ();
}
Plymouth.SetRefreshFunction (refresh_callback);
#—————————————–Display Normal stuff ———————–
#
# The callback function is called when the display should return to normal
fun display_normal_callback ()
{
global.status = “normal”;
if (global.password_dialogue) {
password_dialogue_opacity (0);
global.password_dialogue = NULL;
if (message_notification[2].sprite) hide_message(2);
prompt_active = 0;
}
if (message_notification[1].sprite) show_message (1);
}
Plymouth.SetDisplayNormalFunction (display_normal_callback);
#—————————————– Quit ——————————–
# TODO: Maybe we should also hide any other dialog
# Show the logo and make the progress indicator look full when on exit
fun quit_callback ()
{
logo.sprite.SetOpacity (1);
switch_on_bullets ();
}
Plymouth.SetQuitFunction(quit_callback);
Very nice guide. Thank you for that.
F20. To rebuild initrd, i had to [as root]: dracut -f
Else there is the old show at boot time.
grtz.peter
Can I use SVG images?
No, only PNG. This stand also in the text …
I want to create a splash, where the Boot notifications are visible and in the center a glowing Logo. How can I make this?
I’ve been playing around with Plymouth themes and you’re blog posts have been incredibly helpful.
One thing I’m struggling with is testing my theme. Updates to sprites don’t seem to occur without the mouse moving. Is this something anyone else has encountered and found a cause / solution to?