Plymouth theming guide (part 1)
Judging by the many forum postings and articles, many people do enjoy a nice boot splash and there is a real desire to customise their spin or even the individual machine to their preferred theme. In this guide I will try and show you how to make your own custom splash, walking though the process of viewing, changing and installing. Even if you are a Linux novice, you should be able to follow the steps without much trouble. This guide assumes a Fedora system, although there should be very few changes between the different installations.
Set-up
Obviously you can view plymouth running by turning on your computer, but that does get rather tiresome if you wish to test frequently. Without restarting your machine, there are three sensible methods of testing plymouth: using a victim machine, using a virtual victim machine or using the X11 plugin.
Victim machine
This is the easiest method, although it does require a second physical machine to work with.
If you do not have a KMS compatible system, then you will need to add vga=0x318 to your kernel line. This pushes the console to a VESA graphical mode. The 0x318 actually stipulates 1024x768x32bit mode. To see all the modes and find one most suitable for you, add vga=askme and a list will appear (don’t forget the 0x).
SSH into the machine as root (yes you do need to be root). The splash will be tested on tty1, but tty1 has two problems: there is an X session running on it and if you quit that, getty will start and capture keyboard events. To turn off getty on tty1, edit /etc/event.d/tty1 an comment out all the start and stop lines with a hash.
#start on stopped rc2
#start on stopped rc3
#start on stopped rc4

#stop on runlevel 0
#stop on runlevel 1
#stop on runlevel 6
Then drop to init level 3, which kills X and brings you to an empty console, by running init 3. Now install all the themes you wish to try out:
yum install plymouth\*
This is how to do this in Fedora, you should know the way to do this in your distro already.
Virtual victim machine
The alternate to using a physical machine is to use a virtual one. Both VMWare and QEmu work very well. You will have to do an OS install on the virtual machine. These do not yet support KMS (support is coming soon apparently), so you will need to add the vga parameter on the kernel line. The setup is exactly the same as one for a physical victim machine.
X11 plugin
This method allows you to execute plymouth within X. This is the preferred testing method BUT it can crash your X if you accidentally pick a text theme. It also does require you to compile your own version of plymouth to get the x11 renderer. As root get the latest git checkout:
git clone git://anongit.freedesktop.org/plymouth
Next configure and compile it:
> cd plymouth
> ./autogen.sh --prefix=/usr/ --with-system-root-install
> make
> make install
Now it is installed, make sure you have the DISPLAY set correctly so even if you run as root, it can connect to your X session and display the windows.
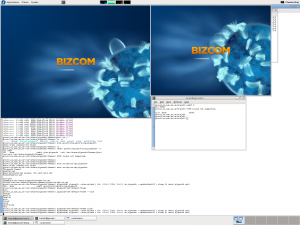
When you run it using the directions below, you will notice you get two screens which allows you to test the behaviour of a two monitor setup.
Viewing
Now you have the system set up, you can manually execute plymouth to examine a theme. First, as root, start the plymouth daemon (plymouthd lives in /sbin/ so make sure you have that in your path):
> plymouthd
Now it is executing, you can control it using the plymouth program. To show the splash run:
> plymouth --show-splash
This should display the splash.
To quit, execute
> plymouth quit
The splash should then quit and the terminal return to its text mode. You may have noticed the progress did not advance very quickly. The progress is estimated using events, based on the event arrival time of the previous boot. To show the splash for 10 seconds and watch the progress moving execute the following one-liner:
> plymouthd; plymouth --show-splash ; for ((I=0; I<10; I++)); do plymouth --update=test$I ; sleep 1; done; plymouth quit
There are several themes installed on your system. To get the full list run:
> plymouth-set-default-theme --list
To change to any of these themes replace –list with the theme name e.g.:
> plymouth-set-default-theme spinfinity
Now you can examine any theme you wish. But what if you don’t like any of them?
Theme editing
It is important to understand the difference between a theme and a plugin. A theme uses a plugin and stipulates some parameters the plugins uses. This information is stored in the directories under /usr/share/plymouth/themes/. Each directory has a .plymouth file which describes the theme, stating the plugin it uses and any parameters the plugin allows to be set. To create a new theme, simply copy an entire directory to a new name, rename the .plymouth file to the new name, and update its contents. In addion, you can now also change the images that your new custom theme uses.
This is sufficient if you wish to recycle one of the already present plugins. For more customisability you can write your own plugin in C which is, to be honest, not very easy. The much simpler alternative is to use the script plugin and write a script to describe the theme, and that is what I shall be describing in the next post.


No comments yet.