Archive for the ‘ Fedora ’ Category

Plymouth theming guide (part 2)

The first part of guide showed how to set up the system to be able to view plymouth themes and make simple adjustments to ones that are already present. This part will show how to make a custom theme, without delving down to the level of writing C.

One of my targets for this year was to add a simple way of designing themes without having to worry about many low level aspects (redrawing parts of the screen, keeping pointers to all elements to free them etc). The scripting language allows the designer to get stuck into the design, while the system is already optimised to take care of and minimise the areas to be refreshed. It is now quite stable and this is the method used by Mandriva for their default themes.

The following walk-though will show you how to make a small example splash. This part should be very easy and even if you have never programmed before, you should have no problems. First download and install the template:

wget -O /tmp/mytheme.tar.gz http://brej.org/blog/wp-content/uploads/2009/12/mytheme.tar.gz
cd /usr/share/plymouth/themes/
tar xzf /tmp/mytheme.tar.gz

Now the theme is installed, and you already have a system set up like explained in part 1, you can switch to it:

plymouth-set-default-theme mytheme

and then test it:

plymouthd --debug --debug-file=/tmp/plymouth-debug-out ; plymouth --show-splash ; for ((I=0;I<10;I++)); do sleep 1 ; plymouth --update=event$I ; done ; plymouth --quit

mytheme_template

Notice this time some debug information is generated and the file /tmp/plymouth-debug-out contains more. The debug information is useful to find any syntax errors in your script. It is a good idea to keep a text editor with this file open and revert to saved after every execution to watch for any errors. A syntax error contains the line and column number of the expression like so:

Parser error "/usr/share/plymouth/themes/mytheme/mytheme.script" L:8 C:42 : Expected ';' after an expression

In the mytheme directory there is a file named mytheme.script. Open this using your favourite text editor. At the top of the example script, there are some lines which create the theme, and below this are sections which control the password dialogue, progress bar etc. You should leave things below the dialogue line alone for now.

Lines starting with # are comments, so lets skip to the first two executed lines:

flower_image = Image("flower.png");
flower_sprite = Sprite(flower_image);

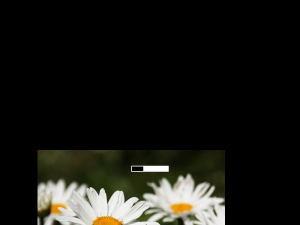
In the mytheme directory, you will notice some images. One of these is flower.png (from Nicu CC-BY-SA), which the first line loads. The loaded image is assigned to flower_image, which can then be used by sprites. A sprite is an image with a position on the screen. The second line creates a sprite using the flower image. By default this is placed at X=0, Y=0, which is the top left of the screen. To change the position of the sprite use the SetX and SetY functions on the sprite. Adding the following line will move the sprite to 100 pixels to the right.

flower_sprite.SetX(100);

mytheme_setx

In a similar way, setting the Y position will move the image down the screen.

flower_sprite.SetY(400);

mytheme_sety

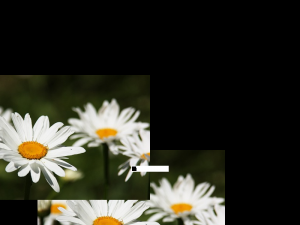
Notice there is no problem if the sprite runs off the edge of the screen. Also notice how the progress bar is on top of the flower sprite. The sprites have a defined order of which is on top. To demonstrate this, lets add another sprite. You can reuse the flower image and place it overlapping with the original flower sprite.

other_flower_sprite = Sprite(flower_image);
other_flower_sprite.SetX(-100);
other_flower_sprite.SetY(200);

mytheme_overlap

Negative coordinates are acceptable. The new sprite will be placed on top of the previous one. To override this, each sprite has a Z value. The higher the Z value, the higher up the stack the sprite is (drawn on top of others). To place the original flower sprite on top you set its Z value to be higher. The default Z value is 0, and you can set it using SetZ.

flower_sprite.SetZ(10);

mytheme_setz

Now not only is the original the sprite above the other, it is also above the progress bar, which also has the Z value set to 0. In general, wallpapers should have Z set to high negative values to force them to the very back and the password dialogue has a Z value of 10000 to place it on top of any theme components. Thus, make sure you don’t place any sprites higher than 10000, otherwise you may find it difficult to type in your password.

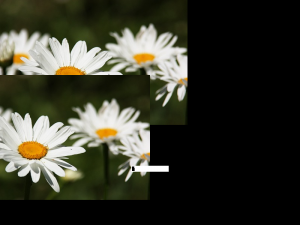
Lets take the sprite back to the background and reposition it. Often you want to set X, Y and Z at the same time. This can be done using the SetPosition function.

flower_sprite.SetPosition(0, 0, -10000);

mytheme_setposition

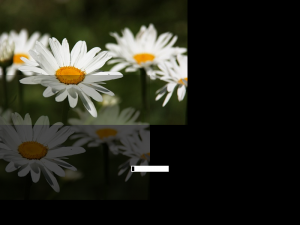
As well as the X, Y and Z values, the sprite also has opacity. The default setting of 1 makes the sprite solid. Values between 0 and 1 make the sprite partly transparent. This can be set using SetOpacity.

other_flower_sprite.SetOpacity(0.3);

mytheme_setopacity

Setting this to 0 will make the sprite invisible. This should return the display the original setup.

other_flower_sprite.SetOpacity(0);

mytheme_template

The image of the flowers is very nice, but it is the wrong shape and size. You could distribute an image for every possible screen resolution, but this would be terribly space consuming. Instead you can scale the image to suit your needs. A new scaled image can be created using Scale and to change the image the sprite is showing, use SetImage.

resized_flower_image = flower_image.Scale(640, 480);
flower_sprite.SetImage(resized_flower_image);

mytheme_scale

Here the image is scaled to 640×480, but this is not the screen resolution. For now, assume there is only one monitor connected (I will explain more about this later). To get the width and height of the screen, use Window.GetWidth() and Window.GetHeight(). You can use these to scale the image to the screen dimensions.

screen_width = Window.GetWidth();
screen_height = Window.GetHeight();
resized_flower_image = flower_image.Scale(screen_width, screen_height);
flower_sprite.SetImage(resized_flower_image);

mytheme_fullscreen

Now the image is scaled to cover the whole screen, but is the wrong aspect ratio (although that is difficult to see in this example). Correcting this will require some programming which will be shown in the next part of the guide.
Plymouth theming guide (part 1)

Judging by the many forum postings and articles, many people do enjoy a nice boot splash and there is a real desire to customise their spin or even the individual machine to their preferred theme. In this guide I will try and show you how to make your own custom splash, walking though the process of viewing, changing and installing. Even if you are a Linux novice, you should be able to follow the steps without much trouble. This guide assumes a Fedora system, although there should be very few changes between the different installations.

Set-up

Obviously you can view plymouth running by turning on your computer, but that does get rather tiresome if you wish to test frequently. Without restarting your machine, there are three sensible methods of testing plymouth: using a  victim machine, using a virtual victim machine or using the X11 plugin.

Victim machine

This is the easiest method, although it does require a second physical machine to work with.

If you do not have a KMS compatible system, then you will need to add vga=0x318 to your kernel line. This pushes the console to a VESA graphical mode. The 0x318 actually stipulates 1024x768x32bit mode. To see all the modes and find one most suitable for you, add vga=askme and a list will appear (don’t forget the 0x).

SSH into the machine as root (yes you do need to be root). The splash will be tested on tty1, but tty1 has two problems: there is an X session running on it and if you quit that, getty will start and capture keyboard events. To turn off getty on tty1, edit /etc/event.d/tty1 an comment out all the start and stop lines with a hash.

#start on stopped rc2
#start on stopped rc3
#start on stopped rc4

#stop on runlevel 0
#stop on runlevel 1
#stop on runlevel 6

Then drop to init level 3, which kills X and brings you to an empty console, by running init 3. Now install all the themes you wish to try out:

yum install plymouth\*

This is how to do this in Fedora, you should know the way to do this in your distro already.

Virtual victim machine

The alternate to using a physical machine is to use a virtual one. Both VMWare and QEmu work very well. You will have to do an OS install on the virtual machine. These do not yet support KMS (support is coming soon apparently), so you will need to add the vga parameter on the kernel line. The setup is exactly the same as  one for a physical victim machine.

X11 plugin

This method allows you to execute plymouth within X. This is the preferred testing method BUT it can crash your X if you accidentally pick a text theme. It also does require you to compile your own version of plymouth to get the x11 renderer. As root get the latest git checkout:

git clone git://anongit.freedesktop.org/plymouth

Next configure and compile it:

> cd plymouth
> ./autogen.sh --prefix=/usr/ --with-system-root-install
> make
> make install

Now it is installed, make sure you have the DISPLAY set correctly so even if you run as root, it can connect to your X session and display the windows.

plymouth-x11

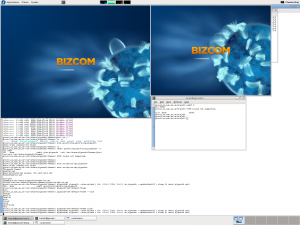
When you run it using the directions below, you will notice you get two screens which allows you to test the behaviour of a two monitor setup.

Viewing

Now you have the system set up, you can manually execute plymouth to examine a theme. First, as root, start the plymouth daemon (plymouthd lives in /sbin/ so make sure you have that in your path):

> plymouthd

Now it is executing, you can control it using the plymouth program. To show the splash run:

> plymouth --show-splash

This should display the splash.

plymouth_charge

To quit, execute

> plymouth quit

The splash should then quit and the terminal return to its text mode. You may have noticed the progress did not advance very quickly. The progress is estimated using events, based on the event arrival time of the previous boot. To show the splash for 10 seconds and watch the progress moving execute the following one-liner:

> plymouthd; plymouth --show-splash ; for ((I=0; I<10; I++)); do plymouth --update=test$I ; sleep 1; done; plymouth quit

There are several themes installed on your system. To get the full list run:

> plymouth-set-default-theme --list

To change to any of these themes replace –list with the theme name e.g.:

> plymouth-set-default-theme spinfinity

Now you can examine any theme you wish. But what if you don’t like any of them?

Theme editing

It is important to understand the difference between a theme and a plugin. A theme uses a plugin and stipulates some parameters the plugins uses. This information is stored in the directories under /usr/share/plymouth/themes/. Each directory has a .plymouth file which describes the theme, stating the plugin it uses and any parameters the plugin allows to be set. To create a new theme, simply copy an entire directory to a new name, rename the .plymouth file to the new name, and update its contents. In addion, you can now also change the images that your new custom theme uses.

This is sufficient if you wish to recycle one of the already present plugins. For more customisability you can write your own plugin in C which is, to be honest, not very easy. The much simpler alternative is to use the script plugin and write a script to describe the theme, and that is what I shall be describing in the next post.

For the hate of APE tags

APE tags are yet another method of tagging media files with metadata. Ever wondered how your MP3 player knows the title and the artist of a song? Well it is through the use of tags implanted within the file, making sure the player does not try to play the information. The three most popular MP3 tag types are:

  1. ID3v1 – the original tagging format form 1993 using a fixed field block with a title, artist and album. All in iso-8859-1, so you probably could still correctly spell Röyksopp and Sigur Rós, but you will have problems adding the artist 峰厚介 – 市川秀男 – 日野元彦 – 植松孝夫 – 池田芳夫 – 稲葉国光 playing track ジンジャーブレッド・ボーイ, both due to the characters used and the 30 character limit in each field.
  2. ID3v2 – came in 1998 with the solution of using flexible and definable fields and allowing the tag to be places at the start of the file. The flexibility allowed apps to keep any kind of information they liked within the file. Everything from the maximum volume of the track to album artwork.
  3. APE – was implemented in parallel with ID3v2 and solves the same issues and the format is even more versatile.

ID3v2 is the most common tag format in MP3 files “in the wild” and most taggers will add an ID3v1 tag from the ID3v2 tag data just to cover both bases. APE, although not as common due to its flexibility, is the preferred tag format in many applications. Rhythmbox for example looks for an APE tag, then an ID3v2 and at a last resort tries an ID3v1. The problem is that most Linux tagging tools, and players which allow you to edit the tags, only write ID3 tags. This creates a bizarre situation where you change the tag of a song in Rhythmbox, the value in the field changes, the ID3 tag is updated in the file, Rhythmbox notices an updated file, it re-reads the file APE tags, changes the field back to it’s original value.

How to kill APE tags?

This is something I have struggled over for several years. There are pieces of Linux software which can edit APE tags, but I found these get confused by the presence of an ID3 tag. For ages, I would remove the ID3 tag from a file, remove the APE tag, then re-insert the ID3 information. This was both clumsy and dangerous as my hacky shell scripts would often do disastrous things with tags that have escaping characters (If you are in a band, release a song named \” rm -Rf *; ).

The pain lasted until the other day, when I looked around and found py-ApeTag. Wow, it just works (that’s my favourite type of working). It removes the APE tags even when obscured by other tags and worked even in cases where I gave up trying to use other software to remove the tag and went by hand with hexedit to damaging the field names so they would not conflict. Applied it to my entire music collection without a single fault. Thank you Jeremy Evans!

How to use

To install, as root, download my altered version of the py-ApeTag module to some bin directory and make it executable.

su
wget http://brej.org/blog/wp-content/uploads/2009/11/ApeTag -O/usr/bin/ApeTag
chmod a+x /usr/bin/ApeTag

To run, execute ApeTag with the filenames of the files you wish to view the APE tag of.

ApeTag *.mp3

Now that you can see the tags, you can remove them. You can apply this to files with no tag and it will not touch them.

ApeTag --delete *.mp3

To apply to all files in your library.

find -name \*.mp3  -exec ApeTag {} \;

Fedora icing

The Fedora 12 release is coming up and I wanted to make some special icing for cupcakes for the release day. This is my first time working with icing sugar so it is mainly based on guess work.

Instructions

In all steps, make sure everything is very dry. Icing sugar sticks to anything with the slightest moisture.

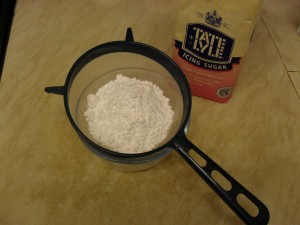
Sift the icing sugar. It occupies a lot of volume but here is only about 200 grams.

icing1

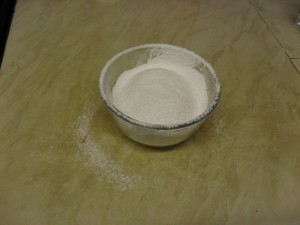
My flat mate calls the bits around the edges of the bowl “making a mess”. I call it “preparing the surface”.

icing2

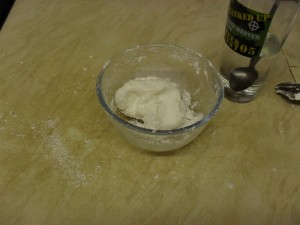
Drop one teaspoon of water into the sugar and work into the mixture with a fork. Don’t use your hands as it will stick. Keep adding tiny amounts of water, eventually a drop at a time until the mixture is blended.

icing3

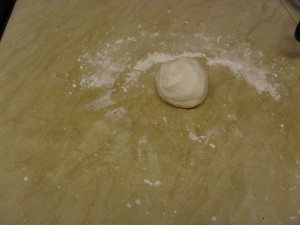
Once it is all in one lump, and it is not too sticky, you can finish kneading it with your hands. Remember the surface should be very dry. The sugar on the surface is just there to mop up any moisture. If it is too crumbly, make a pit in the middle of the ball, add a drop, close it up and hope it doesn’t reach the outside before blending. If you put it on the outside it will stick to everything.

icing4

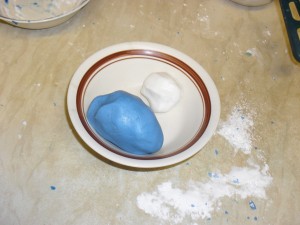
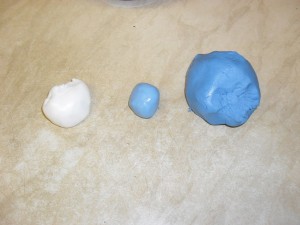
Take three quarters to a separate ball. In a bowl, blend about 2ml of blue icing dye and more sugar, until it has a similar consistency to your original ball. you may have to repeat the process to make it more blue.

icing5

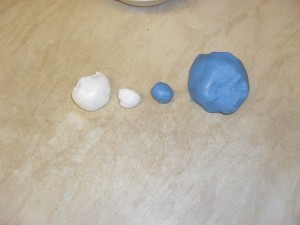
Take a piece of the two balls, and blend together.

icing7

To get a good in between blue I needed to use two parts white to one part blue.

icing8

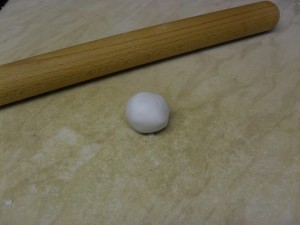
Now all the balls are finished, onto the shaping. Here is an example with the white. You can see my rolling pin in the background. Don’t use it, it messes things up.

icing9

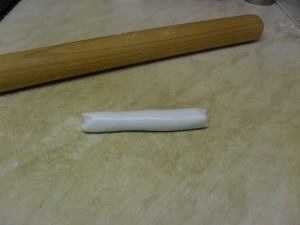
Instead roll out to make an icing sausage.

icing10

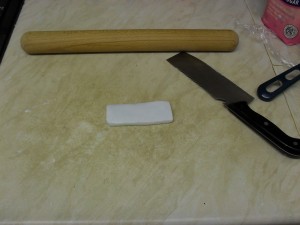
Then use a flat edge to press it down into a rectangle. I used my clever. Use the same flat edge to pat the sides into a neat rectangle. It needs to be longer than the one shown.

icing11

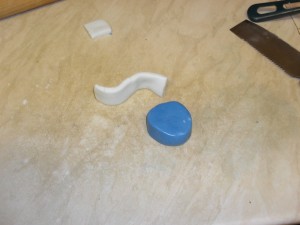
Cut a piece off the end for the cross . You can see how it forms the Fedora f. You also need: cylinder (like one below) cut it into four, two dark blue strips same size as the white one, a two thirds length light blue strip and some left over dark blue icing.

icing12

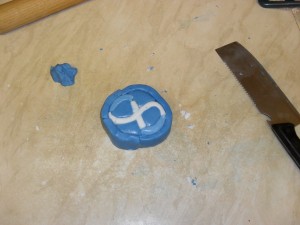
Two of the cylinder slices need to have their corners rounded to make tear drop shapes. Time is of the essence here as you don’t want parts to dry out while you are making others. Start with the tear drops and curl the white around them. Add the small white and light blue strips. Add the two remaining cylinder slices and smooth them to the infinity symbol. Finally, surround the whole thing with the two blue strips (if it was one strip it would crumble).

icing13

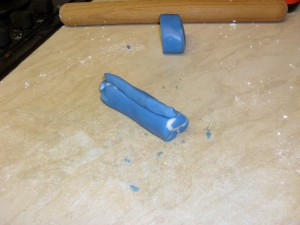
While it is still warm, you can start stretching it. Start by squeezing the whole thing between your hands from all sides until it becomes sufficiently long to roll. Then start rolling it very slowly, evenly and gently (this is not dough, no long starch and protein strings). Here I cut it into two as I wanted two different sizes. Once it is the desired size, form a small strip with the left over blue and continue rolling back and forth without destroying the ridge.

icing15

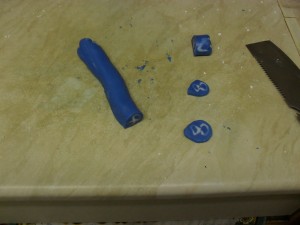
Don’t do what I did and cut them straight away. Put the whole roll in the fridge for 10 minutes to let it firm up. The ones at the ends will be somewhat malformed.

icing16

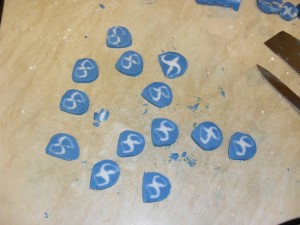
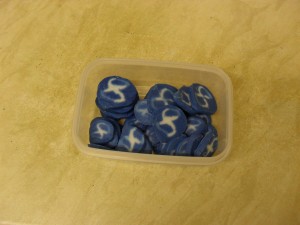
You can see that they become misshapen if you cut while it is still soft, but they are easy to reshape. Don’t leave them on the work surface, get them onto some tin foil and into an warm oven to dry out. An hour at 50 degrees Celsius made them sufficiently crumbly to make them not stick together in a storage box.

icing17

These will last forever so long as they don’t get wet. You can have them in their crumbly state stuck into ice-cream, or add a few drops of vanilla essence which will make them soft on top of a cupcake.

icing18