Archive for the ‘ Projects ’ Category

COMP20252: Mobile systems

This year, I had a go at doing some teaching at the COMP20252 computer science course. I will try and record some of the things I tried so they may be useful to others. You may wish to jump directly to the summary before reading the body.

Previous years

This course has been running for 4 years now. I originally designed the lab element and have been involved in the labs to help with any issues, so I got to know the issues involved. I was most concerned with the lab element where the restriction on my in designing it was that they had to work in groups, having weekly meetings and many of the marks being awarded for group work. The idea behind this was that this would teach them to work in groups, like they would have to in real jobs. This is great in theory, but I felt this approach was very unsuccessful.

In the very first year of the course, the groups would consist of four students. In their first meeting, the students elected a manager and proceeded to implement the different parts of the task. The manager would do no coding and would just instruct the others. This was a recipe for disaster.The students quickly realised that their effort would be divided by four and shared to lazy collogues. In each group, about one student would switch course (they can do so within the first three weeks). This dropped most groups down to three, which they would use as an excuse for doing no work. The work was scattered with one student sitting at a computer and three sitting around them playing with their mobile phones. Students soon realised they were not necessary to the process and would stop attending. The morale was incredibly low and nearly all the questions in the labs, rather than being technical, begun with “this isn’t fair because…”.

Things to learn

There were a number of things that I learned from this about students that I wanted to solve.

Students just want marks

Turning up to labs is not something that many people would do voluntarily. Most students do turn up. Not because they are fascinated about the subject and they decided that the perfect time to satisfy their curiosity is at 9am on a miserable Thursday morning. They are there to do a job. And that is the way the lab component is described to them, “a job”. The job is to get up and receive their marks so they can go back to bed. They are interested in the most direct route to getting their points. After they get these, the work they have done is thrown away, so there is little desire to make the work expandable, tidy or correctly commented.

Students hate each-other

They will happily cut their noses off to spite their face and then present you with the said nose crying “look what they made me do”. When working in a group with one of two lazy individuals, students will simply refuse to work. Because they see the marks as the result of their work, giving these away to uncooperative colleagues feels wrong.

Students look for excuses

One of the most shocking things I noticed was many students putting a fantastic amount of effort to get compassionate marking. Interestingly, this was much more prevalent when it came to tasks in which they never faced before, yet could be performed very quickly. Boring tedious tasks were performed happily without any agitation. As a student, you quickly learn that you may get stuck for hours, maybe days on a problem and have little to show for your effort. This is difficult to appreciate as someone who understands how to do the task, but imagine picking up a 700 page reference manual for something you don’t really understand and be expected to get something working within a couple hours. So risking even trying for perform these tasks may be a huge waste of time. Finding an excuse gives much more consistent results and doesn’t damage your self respect.

Preparation

The lecture course was only using 12 of it’s 24 lecture slots expecting students to use the extra hour per week on personal study of the field (you can guess what happened). I asked Doug if I could give six extra lectures explaining the lab and he agreed. This was in December so I only had two months to prepare.

Psychology

I felt the majority of the challenge was psychological, so I downloaded a lecture course of developmental psychology (search torrent sites). These are 30 minutes per lecture, but time stretching these, you can get then down to about 18 minutes. I could do two lectures on my commute in to work and two on the way back. This way I listened to 20 lectures per week without it impacting my work time. Although many concepts are rather woolly and unscientific, I can wholeheartedly recommend these if you are trying to be a good educator or parent.

This is a massive field of study but for the purposes of this post I will try and summarise it. Developmental psychology examines the change of character that is necessary for individuals to progress though their different roles in life. Here I concentrated on Erik Erikson’s theory of industry and  identity. It felt a bit silly using some approaches that should only be applicable on children 7-11 years olds, but these are very important as years of school grading, target chasing and little appreciation for extra effort, have regressed these people into grade producing zombies. Before you can get people to be motivated to work voluntarily, without the assurance of success and without a direct connection to a reward or punishment, several barriers must be broken.

  1. People feel worthless and unappreciated. Much of the effort on their part is not recognised.
  2. People don’t identify their expertise as valuable. They dread being asked what they do as they think other people will think poorly of them.
  3. People feel anonymous and hope they can fade into the background. There is always one correct answer to all questions, so thinking differently is usually punished.
  4. People are afraid of decisions or committing effort in case they are wrong. Putting in effort into the wrong direction is usually punished which makes people afraid of commitment.

Subject

The subject involved a lot of hard core mathematics. This is not only very hard, but many find it rather dull. This, I wanted to learn to a very deep degree beyond that what is useful in the lab exercises. Not because I was afraid of hard questions, but I wanted to find other uses for each element taught. Advanced mathematics is one of the subjects that has very little function in day to day life, so committing yourself to learn something of little practical use is somewhat hard.

I wanted to move the lab to use techniques implemented by current devices. This had a double use as students would believe they were learning something that was novel that would be practical, rather than academic. For example, Hamming versus Reed-Solomon error correction. Virtually every error correction system nowadays uses Reed-Solomon, while hamming remains an academic curiosity. When students see this, they know they are learning something they will be able to apply, rather than learning for the sake of learning.

Lectures

In total I presented six lectures. The structure of each lecture was the following

  • 5 minute subject motivation
  • 40 minute content of subject
  • 5 minute off-topic cool-down

Many people would turn up a couple minutes late, so it is a good idea to not to put something too important right at the start. Here I presented why the subject talked about in that lecture is not just important, but also exciting.

Every area of computer science has gone though massive changes over a relatively short period of time. It is possible for people to come into a field and make great leaps of advancements which will be regarded as amazing by the community, and useful by millions of users. These advances were not done by people sitting in rooms and emulating each other, by but rather by people who decided to pick up the baton and run ahead. And if you want to be awesome and advance our civilization, then concentrate for the next 40 minutes and I will show you where the current frontier of knowledge is.

This only woks if you are leading to the most advanced systems out there. Following this with some ideas from the sixties would not work.

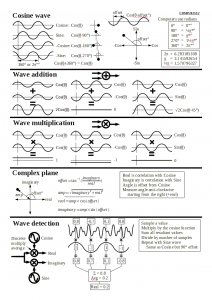
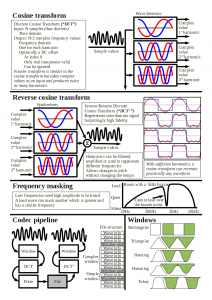
The body of the lecture was intense. I tend to do one slide per minute when talking to experienced researchers and they have problems keeping up. When doing these lectures, I went even faster, in the knowledge that if some parts were not understood, I would get feedback and explain them though other means. Getting the feedback was easy (I will explain below) and supplying any extra info using moodle seemed to work. The second element essential to cover a lot of material is good handouts. Slides make terrible handouts, and instead I went by my philosophy that every lecture can be summarised down to two sides of paper. Below are the handouts of one of the lectures. You may notice that unless you were there, they may not make sense. These provide a reminder of the ideas discussed  along with values which are useful when implementing the ideas in the lab. They are not even the same examples as ones presented in the lecture, so they serve as an exercise for people who think they understood the lecture.

The cool-down is very important. If you have just sat though a 40 minute information blast and you feel grumpy, tired and you now want to forget everything, you need a reminder that whatever effort you make, will be appreciated. Here I would begin with a review of the lab progress (looking at the lines of committed code) followed by tips on how and why they could get this better. For the first couple weeks I talked about coding discipline showing how you can increase your productivity though self discipline.  Then moving onto how hard work will get you noticed. An interesting factoid is that several large companies pride themselves on hiring the top 5% of the graduates. If you look at the productivity of the 45 active students on the course you can see why. Below is a graph of the of the lines of code produced by week 4 for each student. The top 10% more work than the remaining 90%. So you can see why the companies do this (you get someone ten times more productive and you pay them say two times as much), and why you should work hard to get there. The companies who chase the students offer delicious carrots while working as a code monkey only gets you a regular beating with the motivating stick. If you want to be rewarded, then work hard without the threat of a stick. If you only work when threatened, then that’s what your employers will do.

The next point is to say “Do something!”. If you want to show you are capable of working without threats, then do something. You don’t achieve anything by just sitting there being clever. Use your brain to do something awesome. Computer science is the best subject in the world. There is no subject that comes close. The following needs to be shouted:

There are professors in English department saying if you study some course well you may be able to write a poem or something and someone might care about your pathetic worthless existence for another minute. In computer science you can, radically revolutionise the way everyone carries out everyday tasks. The people who created the processor or the software on your computer are producing more copies of their work than any book, song, movie or any other piece of work. If you want to change the world, here is where you start…

This then leads onto encouragement to try creating something using the skills they heave learned. There are so many open source projects out there that people can contribute to. Next time you meet someone you like at a party you could say “What web browser do you use? … Oh! I wrote parts of that!”. Next time you’re at a job interview, you can say “I’m not afraid of writing code, in fact your company already relies on things I have written”.

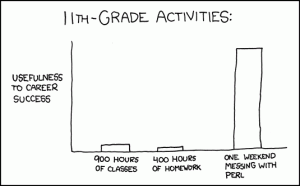
(cc) xkcd

Labs

The tasks in the lab remained the same. I couldn’t scrap the group system, but I could change the way the tasks were divided. This time there were groups of three, with each member being able to perform their portions independently.

Make submit

To make it easy for students to get help, I added a “submit” target in the makefile. This would create a tar file with their files and copy it into a write only directory in my home space, with their name, task name, time and date in the filename. Along with the source files, the tar would also contain the .make_dates file. Whenever the student would run make (every time they made a change), it would record the time and date in the file.

At my end, I had a series of scripts which made life easier. Every minute a notify-send call would tell me if there were submissions in the queue. When I was marking, a script would expand their submission into a marking code tree, and would compile everything to show me any compile errors. Secondly it would diff the current submission with the last submission in the old-submits directory. Finally it would open a Thunderbird write window with the address, subject and part of the body filled in.

I could then run the compiled program in valgrind or ddd, look at the diff and within seconds send back help or comments. The diff would also show the number and times of the compiles since the last submission which is useful to see how long someone has been struggling over a problem. About half the submissions were with erroring code. The majority of these were trivial issues they had never seen before and easy to explain. Some had bigger problems but lacked the knowledge of how to do deep debugging. Here I replied a series of commands I used to find the problem. I didn’t want to give away the answer, so sometimes I would get a reply saying they were still confused, which would return more details in the specific area they were lost in. Half of submissions had working code. I encouraged students to submit every hour of work or at every milestone in their program. They would do this and receive a reply saying what bits were good/bad, give tips and asking if they knew what they were going to do next. This was very useful as they would say what they were planning to do in the next hour, and then doing it. This helped them divide the problem up and gave them targets. Here they would also state any elements of the lectures they did not understand as they were about to implement something that they were unsure about. Most students had a unique misunderstanding, but when there was a series of problems, a moodle posting could clarify things.

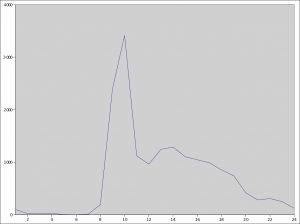
When I timed myself, I could deal with most submissions in less than three minutes (trivial problems or just progress updates) and the average wait time was about five minutes. I kept this down to the absolute minimum as I knew that if students were stuck, they would walk away from the computer after ten minutes of frustration. This meant being on call pretty much all day and night. I was at the computer at those times anyway, so it was just a case of putting down what I was working for a few minutes. The graph below shows the number of times students ran make during the different hours of the day. The labs were 9-11, yet most work was done outside the labs. Also note that students do like to work quite late.

Memorizing the state of over 40 students’ code is pretty hard, but it is worth it. They can see that every bit of effort they make is appreciated and noted. Secondly, they don’t feel like a chump who is working harder and later than others for nothing. You can clearly see this with the first submit they make in the late evening and upon receiving the reply almost instantly they are assured that working hard is normal. Also, a few simple words of praise work very well for increasing their morale. Follow these with a reassurance that they should be able to tackle the next large element, and they will believe you and go for it.

In total there were over 700 code submissions and 1000 sent emails for the first task.

Code exchange

In the first task each student was working on a different unrelated part. In the second task, they rotate their work and perform optimisation on another group members’ code. To do this properly, they have to understand what their code does. Here the idea is that each student can proudly show their work to someone else. By this point they are hopefully comfortable in that their work is impressive and they are not shy about their accomplishments. Even after this initial explanation, the students would have to go to each-other to ask for help. Hopefully they would notice that if you want a colleague to help you, you have to be nice to them and writing good clear code would give them less work explaining things later.

Each optimisation patch had to first pass by the original coder, who would make sure it doesn’t damage the system. If it did, they would receive penalty marks for not testing thoroughly. This made people triple check code before sending it to the original coder, as their clumsiness may cost their friend some marks. Even a consistent indenting style was important (something few students bothered with until that point).

In this task there were over 400 code based email exchanges that I was a part of. Sadly the majority of these were in the last three days of the three week task. There was a slight deadlock as each group member was waiting for another to submit the first patch. Two groups that had an early patch exchange and these finished over a week before the deadline. A compulsory trivial patch exchange in the first week may have been a good idea to get rid of the fear of being the first to commit.

Summary

I volunteered to work on this course, but I was only allowed to do this on the condition that it would not impact my day job. So the work was done in my spare time, while keeping up with my normal work up to date. This was well worth the effort to get the experience in management. Sadly I will not be doing this next year, so I hope some of the methods I described above are attempted by people. I am very proud of the effort that the students have put in. The strong students produced an exceptional amount of work, and many of the disaffected students started engaging and putting in real effort. The biggest failure was the lecturers putting the increase in productivity down to their threats, encouraging weak students to go to another course at the beginning of the semester. I promised students recognition from the staff, and I somewhat failed to deliver on this.

I would like to thank all the students work working incredibly hard, and hope the skills they learned will come in useful. I am sure some individuals will go onto do great things.
Coding discipline

Over years of programming I have learned how to be most productive, but I found it strange we do not teach this to the students. We teach obscure features of academic systems they will never see again, but we fail to teach how to tackle large projects. Course lab tasks usually consist of writing around 30 lines of code, which doesn’t expose the students to the challenges of large code bases. Here are some things I tried to teach this year in COMP20252.
The one hour cycle

I code in cycles. During these I try to disconnect as much from environmental distractions as possible (headphones). These cycles are roughly one hour long, including a 5 minute break at the end to commit the code to the repository, have a biscuit and a stretch. There are three reasons for this and I think it makes sense for students to learn this as a sensible method of being productive.

Set-up and burnout

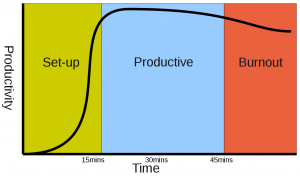
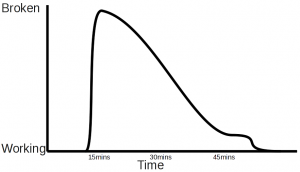
When starting a new change on the code base, I spend about five to ten minutes trying to locate all the areas that will need to be changes and generally planning how to tackle the problem. After about 15 minutes, I am in full swing as I have everything I need to know, cached in my head. At this point I can code for hours straight, but generally I target to finish after a further half an hour and move onto testing and debugging. The reason for stopping so early is because there is a good chance you will burn out (become tired and clumsy).

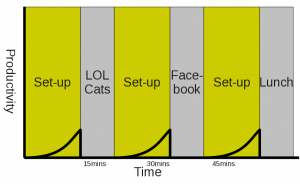
The first ten minutes are not productive, yet most students will only work for 10 minutes at a time before updating their status to “Bored now” and having a chat with someone before starting again from the beginning.

Testing and debugging

In half an hour of coding you will probably write about 50 lines scattered between several files. The rule of thumb is there being one bug every ten lines of code. So, you now have five bugs to find in 50 lines of code. Testing while you still remember what you may have broken is very easy compared to testing something that was written by someone else, or by you but months ago. Finding the bugs, knowing they are somewhere in the small blocks code you have just written, gives you a massive locating boost. This is the main reason why you should never abruptly walk away from the computer without doing some testing. Test and debug will hopefully take five or ten minutes, but can often take an hour. If it does take an hour you will be grateful that you didn’t carry on coding until you were exhausted.

There is one even greater sin than that of walking away from a computer leaving untested code, and that is leaving the code in a broken state. Each programming task involves breaking an already working piece of code in order to add functionality, change the behaviour etc. In the set-up you will probably want to examine the current behaviour of the system to ascertain the areas that need to be changed. This is very difficult if the system doesn’t work.

Students rarely do any testing as they never see their code coming back to them. After writing something and finding that it broke the system, they would generally walk away hoping the bug fix itself in their absence. The next week they would ask a demonstrator to fix it for them while saying “I can’t remember what I did”.  Their original buggy code coming back week after week scared many students in COMP20252. In the feedback forms, that was one of their main criticisms. I say “GOOD! Be afraid. Very afraid”.

Divide and conquer

Forcing yourself to have a working system every hour partitions large tasks down to sensible sized components. Many of the students, from the start, wanted to create a large system involving several ambitious components. They would begin by writing a massive monolithic block containing all the features expecting that, once you write that last line of code, the program will work. This is bad on two counts. Firstly, it won’t work due to bug problems outlined above, and secondly there is no way you are going to keep so much state in you head. Even if you can keep track of the state of every variable you’ve used, all the possible input combinations and every possible error that could arise, you are making the job unnecessarily hard for yourself and for anyone else reading your code.

There is one more bonus reason of why you want to return to working code sooner rather then later, and that is the frequency of random unblockable interrupts. I receive a “stop what you’re doing and help me with this” request several times a day and with small changes it is still possible to revert the changes (infinite undo in nedit) and play them back to remind myself as to what I was doing. If I do have to revert and start again, then I have wasted at most half an hour, but at least I know what I am doing the second time round.

Tidbit: More technical

In the previous post I covered the ideas behind tidbit. In this post I will try and cover the technical aspects of the tidbit system. Currently the work is very exploratory, so everything may change.

Tidbit record structure

This is a typical tidbit which was generated using the Rhythmbox plugin:

TIDBIT/0.1; libtidbit/0.1; Rhythmbox Tidbit Plugin v0.1
tidbit_userkey==usePzEg4Cl4g1ASdzpssVHtQ1hJJilS+ryiBWjF...
tidbit_table==audio/track
tidbit_created:=1281479640
tidbit_expires:=1313037240
artist==Arcade Fire
title==Keep The Car Running
album:=Indie/Rock Playlist: May (2007)
genre:=Indie
year:=2007
play_count:=34
rating:=0.8
tidbit_signed:=JyJ1fIwhRL5t3y9CACmshm/UibYVhvInxh7XVx4...

The first line is the header. It states the version of the tidbit followed by the user agent. The rest of the record is composed of key-value pairs. The key has a strict format of lower-case letters and underscore. The value can contain any character above 0x1F, and is terminated by a new line. Other characters must be escaped. The first  four pairs are compulsory and they all contain “tidbit_” at the start to distinguish them from normal data. The userkey is a unique(ish) 1024 bit RSA key the user uses to identify themselves and also serves as the public portion of their signing key. It is base64 encoded and in the text above it is clipped but in reality it is over 100 characters long. Table is compulsory field which designates the subject matter. The created and expires values state when the record was created (must be in the past) and when it will expire. Expired records are no longer valid. These are currently using Unix time, but a more general format will be used in the future. This is followed by a number of values specific to the record type. Finally, the record is completed by a signature which signs the body up to that point (also base64 encoded). The signature is generated using the user key which signs an SHA512 hash of the record (up to that line). There is a hard limit of 2KB per record to prevent abuse.

The separation between the key and the value is either ‘==’ or ‘:=’. These signify if to search for that value, or overwrite the value. When inserting a new record, a search is performed for any records which match all the key/value pairs with the ‘==’ separator. These records are discarded as they are overwritten by the new record. To ensure the correct sequence in cases where an old record is re inserted into the database, the created date is checked. This allows a record to be updated by destroying an older version.

Library

A library (libtidbit) handles most of the complexity of creating tidbits, key handling, communicating with databases and performing queries. Keys are stored in a gnome-keyring. There are also python bindings which make creating plugins simple. Here is partial mock-up of an example use in Rhythmbox:

In this plugin, forming tidbits and passing the out is very easy. Presenting the data is the hard part.

Databases

There are several database backends used in tidbit:

  • Memory database is used to cache recently accessed records.
  • Fork database is not a real database but rather a connection to two, which fetches records from the local database to minimise long distance transactions.
  • D-Bus database is a service which allows several applications to share a single cache, and minimise external accesses.
  • HTTP database is the method used for long distance transactions with the global servers.
  • Sqlite database allows cached records to be saved between sessions.

The default database supplied for libtidbit access is a caching fork of a memory database and a D-Bus connection. The D-Bus service wakes up automatically to connect the applications to the global servers.

There are just three database commands at the moment:

  • Insert to push new tidbits into the system
  • Query to ask for tidbit GUIDs which match a query
  • Fetch to get the full record from a GUID

The GUID is actually the signature and is unique(ish) to each record.

Example

Lets do a 2 minute into of how to create and post a tidbit for a fictional TV application. The following should be the same in both C and Python (although C requires types).

Step 1: Get a key

key = tidbit_key_get ("mytv", "MyTV v1.2");

Here we supply the name of out application twice. The first should never change so we pick up the same key each time, and the second is used for the user agent.

Step 2: Get a database

database = tidbit_database_default_new ();

This gets the default database on the system.

Step 3: Create the record

record = tidbit_record_new ("television/episode");

This creates a new record we can put data into. The table name is compulsory so we supply it here.

Step 4: Add the data

tidbit_record_add_element (record, "series_name", "Ugly Betty", TIDBIT_RECORD_ELEMENT_TYPE_KEY);
tidbit_record_add_element (record, "episode_name", "The Butterfly Effect (Part 1)", TIDBIT_RECORD_ELEMENT_TYPE_KEY);
tidbit_record_add_element (record, "rating", "0.6", TIDBIT_RECORD_ELEMENT_TYPE_VALUE);

Note the difference between the key and value entries (as the ‘==’ and ‘:=’ before). We may change our rating later, so that is a value, and so overwrite the records which match on the keys.

Step 5: Sign the record

tidbit_record_sign (record, key);

Once a record is signed, it cannot be altered.

Step 6: Insert it into the database

tidbit_database_insert (database, record);

Step 7: Tidy up

tidbit_record_unref (record);

Now we are finished with this record, we free it. By now, the record is happily on its way around the world.

Development

If you have interests in the semantic web/distributed hashtables, you have an idea for an awesome application, you found a fundamental error or you just want to have a bit of a play, then the source is available.

Tidbit: A global database for exchanging signed tidbits of information

Social everything

Many of us, use a range of range of so-called Web2.0 services.

  • Social bookmarking which enables you to recommend sites as well as tag sites with relevant words to make searching easier.
  • Microblogging services allowing you to inform your friends (and others) of your status, while attaching tags to the message.
  • Systems which note the music you have listened to recently and share that with the community, recommending other music and events.
  • You can declare yourself as going to an event and check if your friends are too.

This is a system which will keep expanding and undoubtedly within a couple years your bike will send out a message to say you are stuck in traffic which warns your friends that you will be late, while telling others to avoid your route. As you take a photo of the space invader mosaic, your phone will ping out the image with its GPS position to an urban art site with the tag of the artist, while informing you that there is another one just round the corner.

Fear of clouds

Great! The future is awesome! Well, not quite. There are several weaknesses to these systems.

  • Each system requires a sign-up. There are solutions like OpenID which make this easier, but generally you cannot use them anonymously very easily.
  • There are multiple providers for each kind of service, so you may have to keep several profiles up to date and post your data to several services.
  • The data is transferred to the service owners so only one company can make use of it. Users are giving this data out for free, and that’s the way they would like to keep it.
  • Services close. If you have built up a massive profile of contributions with millions of followers and the service dies, you are left with nothing. No you can’t take the data and create your own.
  • Competition is stifled. Imagine that you thought of a system like Facebook but better. Who would sign up for that? There is no chance of cooperation between companies to allow new competitors.
  • It is difficult to queue up data when not connected to the internet. You have to wait till you get home to write a review of that restaurant in Thailand which does great tofu.

So, this “Tidbit” thing?

The principle is pretty simple. You don’t send your data directly to the service provides, but to a distributed open database. Each piece of information is a “tidbit”. Anyone can post, read and search for these tidbits. If you wish to provide a service, you read the tidbits that are of interest to you. No one gets to keep a monopoly on the data and everyone has the opportunity to to use the data to make new inspired products.

Anatomy of a tidbit

Each tidbit contains:

  • Your username. The username is actually your public signing key. You can generate a new one whenever you like and is completely private (unless you reveal your identity to someone).
  • The date the tidbit was created and when it should expire. Most data becomes irrelevant after a year so that is the default unless you set it to be longer.
  • The table the data belongs in. For example “audio/track” would be talking about an audio track you have listened to.
  • A set of key value pairs which hold the data you wish to tell the world. There is no fixed structure so your tidbit can contain fields which will be ignored by some applications.
  • A signature to make sure it was you that generated that tidbit. It is impossible to adjust the data without damaging the signature, so no one can spoof as you.

You can’t trust this

Stop! Reality time! This is bound to be abused by spammers, robots etc, just like the current services, but worse. I can’t trust anyone.

On top of this system, you can extend a web of trust. You can post a tidbit stating your trust of someone. Say you only fully trust the 10 people you know, but they trust 10 more and so on. You might only trust an individual a little (since they are several friends away), but if you combine a whole group of people you trust a bit, you get a fairly sensible picture. You can also partly trust someone who you have only a little confidence in due to information they posted, and perhaps only for some kinds of information (music taste only). Producers of original content are thus rewarded with respect of their audience, while building a network that gives people confidence in the data.

I want my privacy

Privacy is at the core of the system. You may choose to only reveal your username to your friends. Only they will know who you are. All applications work with a different auto-generated username, so unless you manually set your movie watching application to use the same username as your dating profile, you essentially remain as two different people. Obviously, all data you post is open for anyone to read, so posting personal information is a bad idea. This is not a system which sensibly replaces private social networks.

Let’s get technical

The next post will be somewhat more technical and explain the system in glorious geeky detail. There is a git repository you can take a look at and if you have questions there is a room #tidbit on irc.freenode.net, or leave a comment or email me.

Utopiums are back

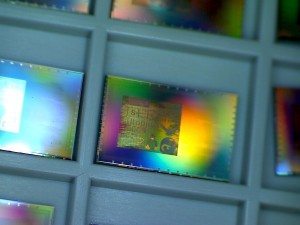
After months being manufactured, the Utopiums are back! I will explain more about what they are in another post, but for now here are some photos.

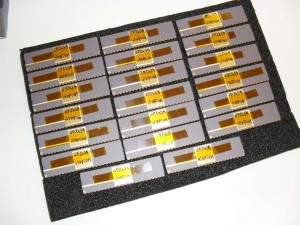
Here are the packaged chips (20 of).

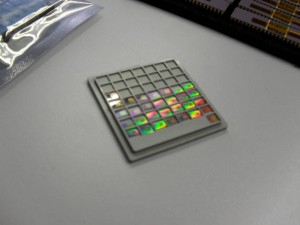
They also send you the remaining unpackaged dies. These have an excellent ability of confusing the camera’s auto focus.

The full die is 5mm by 3mm.

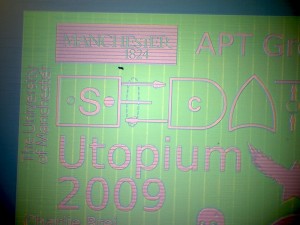
And this is what they look like under a microscope. They do get dirty very quickly when exposed to a dusty room.

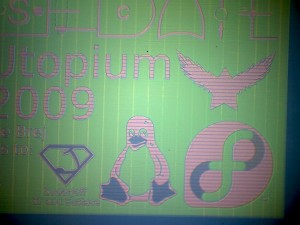
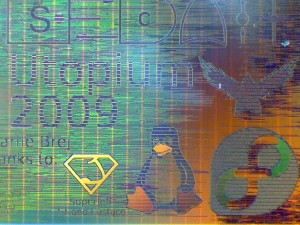
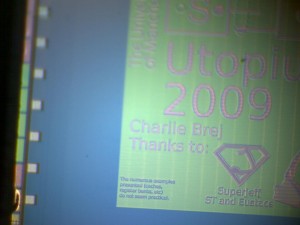
On the bottom right of the chip logo are the thank-yous. The Tux and the Fedora logo are about 0.5 mm tall (perhaps the smallest ever?). You can see the diffraction grating giving a nice secondary colour.

At different angles, they look very different.

And here is a wise comment left by the one of the Async symposium reviewers.

I am still testing the beast, but it does work. It has executed a number of programs and the wagging slices do become by-passable. The biggest worry was the reset as that is quite complicated, but it seems fine. I will open source the design and the tool set some time next month.

Uncapping a Pentium Pro

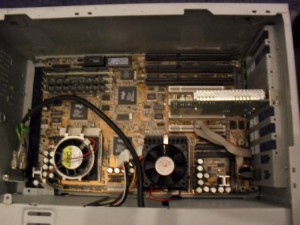
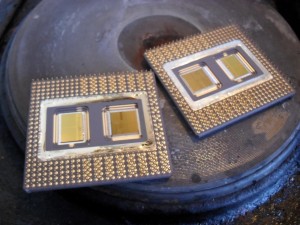
The Pentium Pro is probably the greatest chip ever. Architecturally, Pentium 2 and 3 were just tweaks of the Pentium Pro awesomeness. For years I kept an old machine I worshipped and adored, which was a dual Pentium Pro in an old AT case. Last weekend I decided to throw away a lot of the junk that had accumulated over the years and the computer had to go.

I chucked the case and kept the CPUs. Coinsidently, it is a really bad idea to look on ebay for something you threw away a week earlier. Learning that you just threw away a $200 motherboard is enraging.

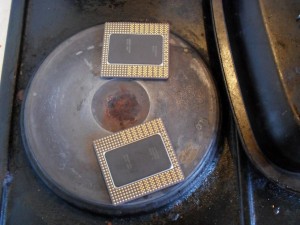
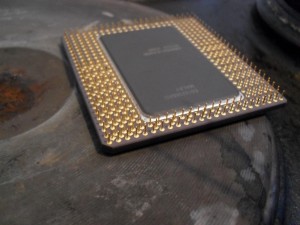
They look beautiful although it makes me wonder how well the heat sinking was working on one of them. Wasn’t as big an issue back then.

#

Getting their tops off

Here are the tools needed. Small pliers for holding the chip in place and a pair of tweezers. The ones at the top are lady’s tweezers, and the bottom ones are ones that came with an electronics toolbox. The electronics ones make it easier to lift off the lid, while the lady ones give you more control when holding the lid so it doesn’t twist and fall back down onto the exposed silicon. You will also need a cooling tray that you don’t mind dripping molten solder onto (here an upside down old baking tray).

When heating random substances  you find around the house, there is a good chance you will release some toxic fumes. Use a mask, keep the room ventilated. Some chips are stuck down with glue which is rather nasty when heated. You won’t get these open simply by heating and you will end up releasing loads of Cyanoacrylate fumes around your kitchen (bad thing).

So, lets get cooking. Place the chips directly on the hot plate. Turn up the heat.

Keep prodding the lid until you notice the solder has melted. The solder will not change visibly, so you have to actually prod it to see. In the photo below, the solder is liquid, but it is impossible to tell.

The lids are now stuck down with surface tension. Im most chips, you can simply slide the lid over a little and it will become easy to lift off. Here the pins are too close to the edge of the lid, so the pointy tweezers are needed pick the lid off. (Note to self: clean cooker)

After this is done, lift using the pliers onto the cooling rack and leave there for more than 15 minutes. These take a very long time to cool down. A couple years ago, I was removing the lids of several chips and I run out of space so I decided to move the cooling tray to the other room. When one of these slides off onto the carpeted floor, this is what it does. Yeah, don’t be doing that, just leave them.

Fedora on USB sticks

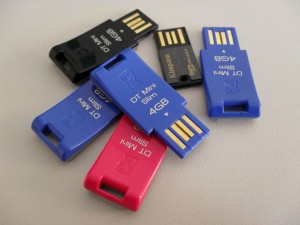
I ordered some USB sticks to give away to the better students to encourage them to contribute to open source software. The idea is that they can run their own installation where they can install development libraries etc. I’ll write more about this in a few weeks when I know how successful this has been.

Installing Fedora on the disks is relatively easy. Nowadays I install computers using a USB drive, by simply DDing the iso directly to the device.

dd if=Fedora-12-i686-Live.iso of=/dev/sdb

The target USB stick will look just like any other hard drive. You just have to make sure you install the bootloader onto the target stick by overriding the BIOS boot order in the grub installation screen.

Once installed, I didn’t want to actually boot the device as I wanted the students to go through the first boot process of setting up a their own user. But I wanted to install some development packages and do a full system update. This can be done by mounting the device, chrooting and running yum commands. The live image has a /mnt/sysimage which is already set up to do something like this by already having /proc and /dev correctly set up.

mount /dev/sdb1 /mnt/sysimage
chroot /mnt/sysimage

The biggest issue with running from USB sticks is that they have no on device cache, thus each fsync command takes absolutely ages. Yum, correctly, makes heavy use of fsync to make sure it leaves the system in a sensible state even if interrupted. To speed things up I tried libeatmydata, which worked surprisingly well. I updated the installation several times faster. LibEatMyData is named thusly because of it’s real ability to screw things up royally, but in this situation if anything went wrong, I could just restart. Maybe some yum devels could mention if this is outright dangerous, or a fairly safe trick if you can guarantee no interruptions.

Of cause at this point I only have one stick installed, and making six this way is out down right boring. So long as the other disks are the same size (or larger), you can clone the disks from one to another. You need a bit of storage space so best to do this from another machine.

dd if=/dev/sdb of=master_image
dd if=master_image if=/dev/sdc
dd if=master_image if=/dev/sdd
dd if=master_image if=/dev/sde
...

Watch out though if you use this method, all the partitions will gain the same UUID, which will confuse the system when more than one is plugged into a single machine.

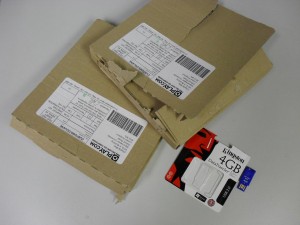
The postage costs are annoying so I went with play.com, who offer free postage (which is nice). What was ridiculous is that they post each item in a separate box which is way too big. For a tiny piece of plastic, there is a Kingston presentation box, each placed in its own massive cardboard box and posted separately. I hear this is because they have some kind of tax loophole where parcels of value below some threshold are not taxed.

The entire CS department has be refitted with awful Dell machines which have some screwy USB chipsets which allow booting off a memory stick only from the back ports on some manufacturers. I did something really stupid by accidentally mentioning to duty-office that it was possible to boot the departmental machines off a USB device. Now they are now going to go through and disable this feature (Grrr).

Utopium test board

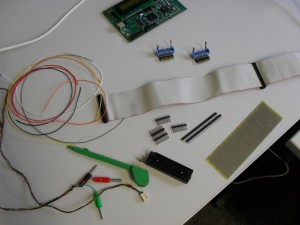
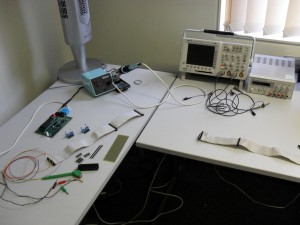
I was expecting the Utopium to come back any minute now, but it appears when the fab says 11 to 12 weeks, they don’t mean from the tape-out date, they mean from some other date a month after (Grrrr). As I was expecting it this week, I made a board that it can sit in. If it works I will make a proper PCB with connections to peripherals, but in the mean time what I need is a platform from which I can observe and control every pin on the chip. Here are the ingredients.

This used to be Matt’s desk but it has been converted into my hardware geekery desk. The scope is a fantastically expensive one that I am currently using as a voltmeter.

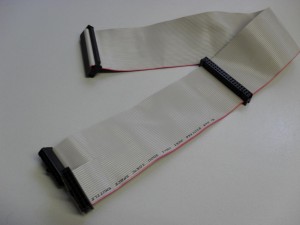
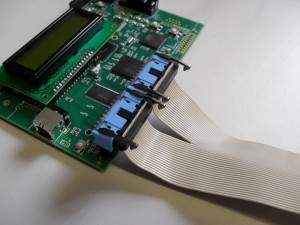
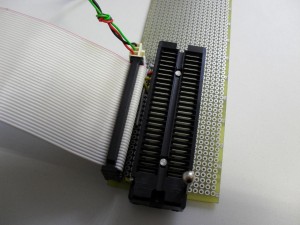
First job was making a cable. The I have plenty of these IDE cables around. Splitting it into two and clipping some connectors, I now have 40 way to two 20 ways that fit into Jim’s lab board.

This is version 3 of the Jim’s lab board. The first one was back in 1999 when I started writing KMD. These boards have a default FPGA configuration which memory maps the I/O pins. This is ideal if you don’t to get into FPGA development just to get something simple going. Everything can be controlled from software running on the ARM.

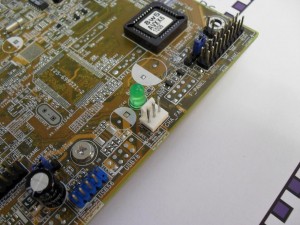
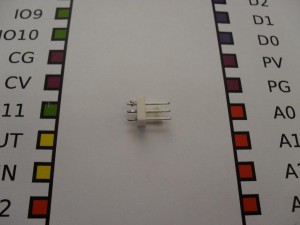
I’m sure we probably have may of these three pin connectors in the electronics cabinets, but since I had an old broken motherboard on the desk, I thought this was easier.

The solder used on motherboards has a much higher melting point which can be annoying when removing larger though board components, but this wasn’t that bad. For large components I recommend placing the board onto an electric kitchen hob hotplate, then after a minute, turning it over and hitting to make all the parts fall out (ventilated room and a mask is probably in order here).

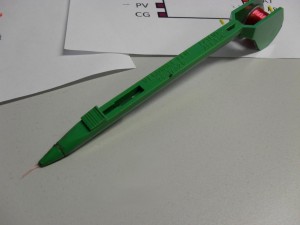
For signal wiring I use a Vero pen. These are fantastic. They are very thin, insulated wires which you wrap a couple times around the connected pins, then use solder to melt off the insulation. The insulation makes the solder point a bit dirty, but meh, they’re connected. Just dont show it to engineers, they suck their teeth and explain how they wouldn’t do it that way and start sentences with the words “Back in my day…”.

The danger of the Vero wire is that you can get it too hot while soldering a point near it and form a connection. The power connections were made using thicker wire.

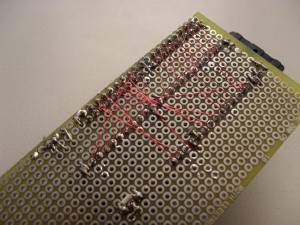
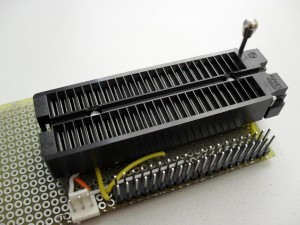
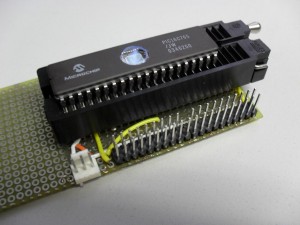
And nearly one hundred solder points later we have a simple board. The ZIF socket is for a 48 pin DIL. These look weirdly long, as will the Utopium, when it comes back.

Happily connected to the Jim board, and tested for any shorted connections. I did this by flipping the I/O pins about. If you get values stuck half way between the rails, then something is shorted. This happened to me, but luckily the FPGA was quite robust to short connections and it worked fine after correcting it.

Here is a PIC in the socket. You can see how much longer the Utopium will be.

Well, one month left until she comes back. Can’t wait.

Napoleon Dynamplifier

I changed the motherboard of my PC a few weeks ago and one problem I have is that the audio line out signal is not amplified. I have this connected to a pair of massive 4 Ohm HiFi speakers which I found in one of the flats I rented. The speakers are not amplified, which is quite annoying as at maximum volume they are still very quiet. The previous board had a software controlled switch to flip the line out to speaker out. The speakers come with speaker wire leads, which I just twisted to the exposed wires from an old broken pair of headphones (a proper there, I fixed it job). Every so often I would crawl under the desk to re-twist them when I accidentally kick them free.

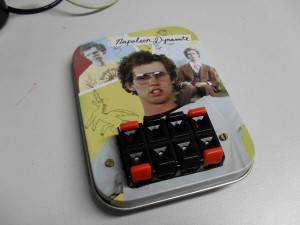
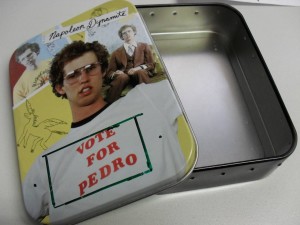
So making a small amp would fix two problems in one go. I was looking around the office for a nice box and here is one I found.

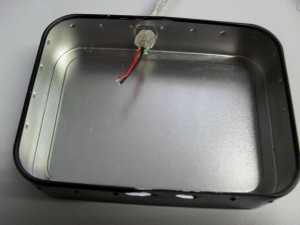
Sorry Pedro, but this amp is more important than your election. I was planning on stabbing a hole though the metal, but Dave insisted that stabbing things is not allowed due to health and safety rules. Instead he drilled the holes I needed.

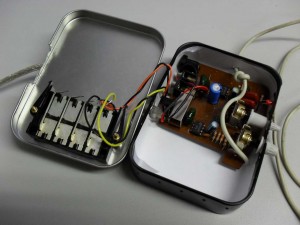
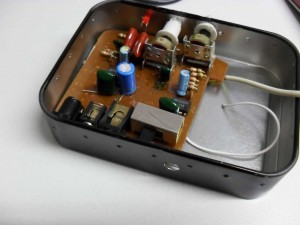
The circuit is an amp from a a small computer speaker set I had. It is based on two KA2209 chips. I could have made my own, but this one was perfect.  These can take quite a bit of punishment. They work from 3V to 15V and use very little power. At 5 volts the board was drawing 30mA. At one point I wired the power and ground the wrong way and the ICs pulled 3 amps, getting incredibly hot in the process. After I corrected the power I was quite surprised to find no damage was done.

The holes were relatively easy to expand by rotating a pair of pointed  tipped pliers inside.

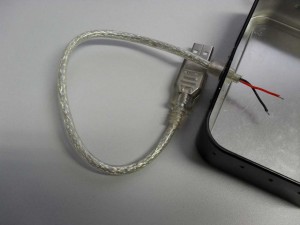
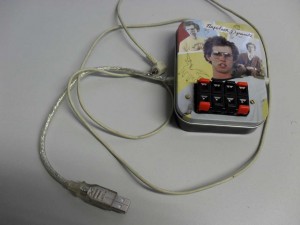
For power I used a USB cable I had from a broken PS/2 to USB converter. USB should give you 100mA without asking, and here we are well within this limit. Most hubs will give the maximum 500mA without any negotiation.

I could only find an eight port spring clip speaker wire connector block. Maybe I will expand it to an 4 speaker system later.

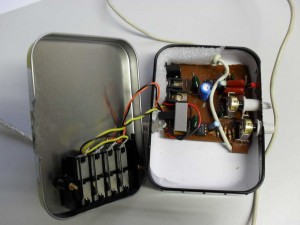
The metal case is not ideal as you have to insulate it from the board, here done with a piece of paper. I forgot to ask Dave to drill a hole for the audio cable, and I fancied using my stabbing approach without telling him. The method I used was taking a drawing pin and, using my thumb, pushing it through the metal sheet. It actually worked. It is a weird feeling being able to push one metal though another. That’s what it must be like to be a Terminator. You can then expand the hole with a cross head screwdriver.

A bit of foam to wedge the board in place and stop it from moving (it was coincidence that it was such a close fit).

The USB cable is a little short but that can be fixed with a USB extension lead (plenty around).  I’m now gonna use it for whatever I wanna use it for! GOSH!

Corner cells

In chip design, there is generally a “pad ring” (a ring of external connections) around the edge of the design. Each of the four edges has a series of wires connecting each pad to the next. This is fine for edges, but when you have to go round a corner, you need a corner cells to connect the wires from the horizontal row of pins to the vertical set.

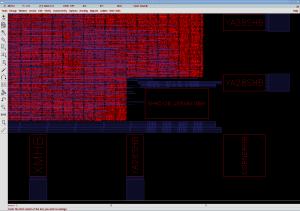
corner_view_our

These YA28SHB and XMHB are names of pad cells. First thing you may notice is that these cells are just red boxes and we cannot see inside. That is because we are not given the “cell internals”, in case we release some company secrets of their construction to competitors. We can use the cells but we cannot see how they function. This is normally fine but then it can cause some embarrassing failures. Yesterday we received a design rule check report from IMEC (the people who are taking care of the manufacturing). Included was this screen-shot.

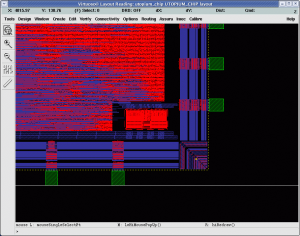
corner_view_their

You can see they get the luxury of being able to see the cell internals and it makes spotting some errors trivial. There are blue wires along the bottom edge, and these need to be connected to the set along the right edge. This is where we placed our corner cell, which turns all the wires by 90 degrees. Unfortunately the cell is incorrectly rotated and is not connecting to either set of wires. This was spotted by IMEC and we have now corrected this, but if it wasn’t it would have been a complete failure.

Two things to take from this. Firstly, giving out cell internals of some cells is useful to spot errors. I doubt there are many engineering secrets involved in a set of wires turned through 90 degrees. The second is to never assume that just because the pins are positioned and rotated starting from the bottom left going clockwise, it will be the same for the corner cells. In this case the corner cells start in the top right.

Fixed this and some minimum area issues and taped out (yet) again this afternoon.