Plymouth theming guide (part 3)
Now the basics have been covered in part 2 of this guide, we can now tackle some more advanced tasks. This part is for beginners to intermediate. If you have never programmed, then this will be a rough introduction to the field and thus you may need to ask for help about some confusing aspects.
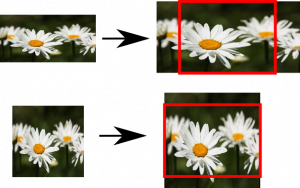
Until now, all the examples have been simple assignments and there hasn’t been much “programming”. At the end of the last part, the background image needed to be scaled without distorting the aspect ratio. If the image is wider than the screen, then the image needs to be scaled up to the height of the screen and let the sides hang over the edges. If the image is taller than the screen, the image should be scaled to the screen width and allow the top and bottom to go beyond the edge of the screen.
You can get the screen ratio using the Window.GetWidth and Window.GetHeight functions introduced in the previous part. The ratio is height to width. The greater the number, the taller the proportions.
screen_ratio = Window.GetHeight() / Window.GetWidth();
GetWidth and GetHeight functions also work on images.
flower_image_ratio = flower_image.GetHeight() / flower_image.GetWidth();
To create the scaled image, the scale factor needs to be determined. If the screen is tall, we make the scale factor such that the image will be the same hight as the screen, and allow it to dangle off the edges. For a wide screen, make the image match the width and allow the top and bottom to go beyond the edges. The scale factor can then be used to scale the image width and height.
if (screen_ratio > flower_image_ratio)
  {  # Screen ratio is taller than image ratio, we will match the screen height
     scale_factor =  Window.GetHeight() / flower_image.GetHeight();
  }
else
  {  # Screen ratio is wider than image ratio, we will match the screen width
     scale_factor =  Window.GetWidth() / flower_image.GetWidth();
  }
scaled_flower_image = flower_image.Scale(flower_image.GetWidth()  * scale_factor,
                                         flower_image.GetHeight() * scale_factor);
flower_sprite = Sprite(scaled_flower_image); # Create the a sprite using the scaled image
Now the image is scaled to the correct width and height, it needs to be placed in the centre of the screen.
flower_sprite.SetX(Window.GetWidth()  / 2 - scaled_flower_image.GetWidth()  / 2); # Place in the centre
flower_sprite.SetY(Window.GetHeight() / 2 - scaled_flower_image.GetHeight() / 2);
flower_sprite.SetZ(-10000); # Place right at the back
If everything went right, your code should look like this:
flower_image = Image("flower.png");

screen_ratio = Window.GetHeight() / Window.GetWidth();
flower_image_ratio = flower_image.GetHeight() / flower_image.GetWidth();

if (screen_ratio > flower_image_ratio)
  {  # Screen ratio is taller than image ratio, we will match the screen height
     scale_factor =  Window.GetHeight() / flower_image.GetHeight();
  }
else
  {  # Screen ratio is wider than image ratio, we will match the screen width
     scale_factor =  Window.GetWidth() / flower_image.GetWidth();
  }

scaled_flower_image = flower_image.Scale(flower_image.GetWidth()  * scale_factor,
                                         flower_image.GetHeight() * scale_factor);
flower_sprite = Sprite(scaled_flower_image); # Create the a sprite using the scaled image

flower_sprite.SetX(Window.GetWidth()  / 2 - scaled_flower_image.GetWidth () / 2); # Place in the centre
flower_sprite.SetY(Window.GetHeight() / 2 - scaled_flower_image.GetHeight() / 2);
flower_sprite.SetZ(-10000); # Place right at the back
If you wish for your background to match the one in your desktop, copy it to the theme directory and edit the script to load the image of that filename. Only PNG files are allowed.
Finally to install your theme into the ramdisk, so it is loaded when your computer starts, add –rebuild-initrd to the plymouth-set-default-theme command. Do be careful not to install a theme which deadlocks. Make sure you have a backup kernel or initrd image if all goes wrong
plymouth-set-default-theme mytheme --rebuild-initrd
Animation
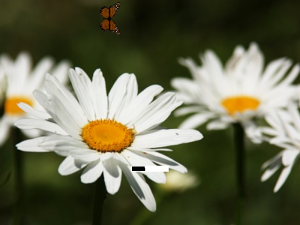
Start by making a new sprite with an image of a butterfly:
butterfly_image = Image("butterfly0.png");
butterfly_sprite = Sprite(butterfly_image);
At the bottom of the block of code you are editing, there is a function named refresh_callback. This is called 50 times a second (unless the system is busy) just before refreshing the screen. Within the function, you can move the sprites around and these movements will be updated on the screen. Take a look at this example:
progress = 0;
fun refresh_callback ()
  {
    progress++;
    butterfly_sprite.SetX(progress);
  }
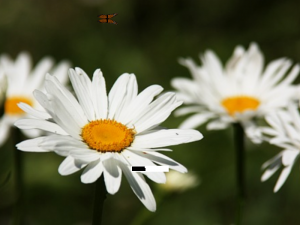
At every refresh, the butterfly will be moved one pixel to the right. To make the butterfly flap it’s wings, several frames are needed. Instead just loading one image, this requires an array of images to be loaded. Replace the original two lines that loaded the butterfly image and created the sprite, with these:
for (i = 0; i < 4; i++)
  butterfly_images[i] = Image("butterfly" + i + ".png");
butterfly_sprite = Sprite();
You can append strings to numbers to create the four filenames. Secondly, if a sprite has not been attached to an image, it will simply be empty until one is set. Adding the following line into therefresh_callback function should rotate through the 4 butterfly frames. Because the progress is divided by 6 in order to slow the animation to one frame every 6 refreshes, we use a Math library function to round down a number to an integer.
butterfly_sprite.SetImage(butterfly_images[Math.Int(progress / 6) % 4]);
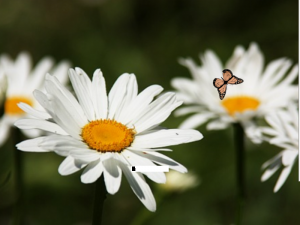
There are some other math functions available, sin and cos are often useful. Replace the SetX line with the following to make the butterfly go around in a circle around the centre of the screen.
theta = progress / 100;
butterfly_sprite.SetX(Window.GetWidth() / 2 + Math.Sin(theta) * 200);
butterfly_sprite.SetY(Window.GetHeight() / 2 - Math.Cos(theta) * 200);
Now the butterfly looks a little weird pointing the wrong way as it is going around in a circle. We need to rotate the butterfly image so it is flying forward. Add .Rotate(theta) to the image while setting it to the sprite. This creates a new image which is rotated by the angle theta.
butterfly_sprite.SetImage(butterfly_images[Math.Int(progress / 5) % 4].Rotate(theta));
If you have reached this point, you should now have all the knowledge you need to start creating your own themes. For a full list of available functions and script syntax take a look at the freedesktop plymouth script wiki. Good luck, have fun and make some nice splash screens.
