Sins of my past coming back to haunt me

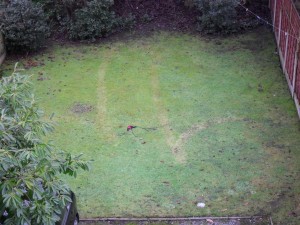
We have had plenty of snow this year, which caused many people act very silly indeed. By “many people”, I mean “me”. Just before Christmas, on my way back from the pub, I decided to stomp a lewd shape into the garden snow (I assume I did, I have little recollection of this). I awoke feeling worse for wear to the embarrassment of the situation, but was saved by more snow falling that afternoon, covering up my work of art and destroying it forever. Or so I thought. This morning I saw this when I looked out the window.

I have no idea how I managed to kill the grass by stomping on it. I am guessing it will take a few weeks to go away. The black bra is off a “snowlady” I made a couple weeks later that the neighbours added to, to cover her modesty in an unrelated incident of silliness.

Tortilla samosas

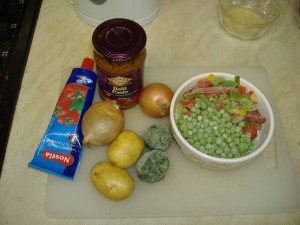
Ingredients

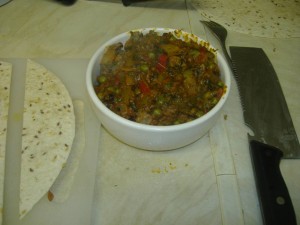
The great thing about this recipe is that I always have of these ingredients in the house. You can put anything you like into these but potatoes and peas are a must. The other filling ingredients I used this time were peppers (frozen since they are going to be cooked anyway), onions (a curry staple since they will make it a little sweeter), spinach (that’s the two frozen green things next to the potatoes), tomato puree, curry paste and (Balti is the most versatile one in my opinion). The shells are simply tortillas and you will need an egg or flour/water mix to stick them down. I have used filo pastry before, but I picked up using tortillas from the hairy bikers, and it works great.

For curries, I alwaus try to use as many frozen things as possible. The cellulose is broken down in them, so they release more flavour and absorb more. Secondly, you can use as much as you want and leave the rest for next time. If you have any filling left over, freeze it. I guarantee you it will be even better the second time round (especially the potatoes). Using the curry paste is also recommended. Dry spices do quickly loose their strength and having jars and jars of them makes sure they sit there for years at a time. The paste suspends everything in oil, so nothing escapes. Also you will be getting a fresh jar every 3 meals or so.

The filling

The potatoes are the thing that take the longest cooking. I tend to chop them into small cubes and boil them in a separate pan. Not sure why, but they never go soft enough when cooked in the curry sauce. In another pan, gently fry the onions. When soft and transparent, add the other ingredients (they don’t need to be fried). Add a little water to make it workable. Simmer for a 10 minutes, then add the now softened potatoes and simmer for a little longer so they soak in the spices. Ideally if you cut a cube in half, it will have the colour permeating nearly to the centre. At this point you have a strong dryish curry with fine chopped ingredients.

The wrap

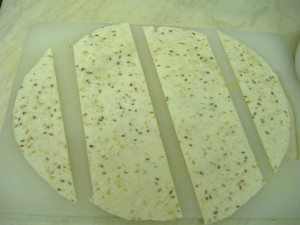
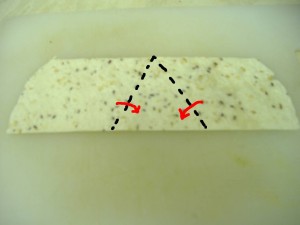
I should mention, here I bought some fancy tortillas with seeds and the like, only because they were on offer. Take the tortilla, cut into three like in the image below. The two side pieces can go to feed any vermin you have in your garden. The middle two are the ones we want.

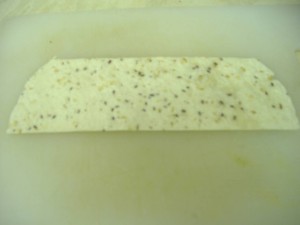
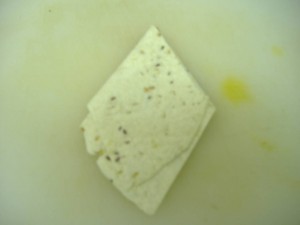
The two slices have a long side and a short side. (the long side is on the bottom here)

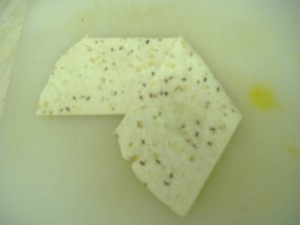
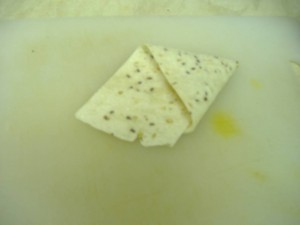
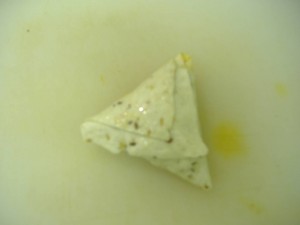
Fold towards the longer edge. (note the staining ability of curry)

Then fold the other side over.

Here is a diagram to make it simple. The more geeky amongst us will notice that all the angles are 60°.

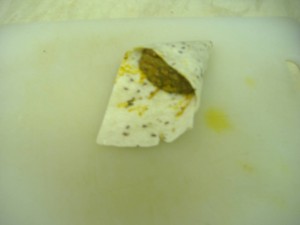
If you turn over, you have a lovely cone.

Now fill with the mixture.

Use the egg-wash to stick it down. The tortilla ones are pretty good at not opening themselves, the filo are more of a pain. Pinch any corners that are too open, down with a little more egg.

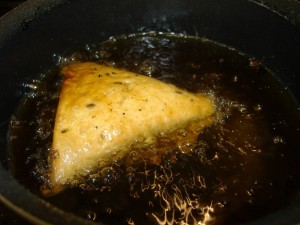
Now to the frying. These want to be deep fried. I say want as you can also bake them. Remember those side tortilla strips that you threw out to the birds? Go back outside and wrestle a squirrel for one of those back. Drop half the strip into a pan of hot oil. The oil should be got enough that it bubbles, yet it doesn’t discolour the tortilla straight away. Probably around 150°C.  If it has been frying in the oil for two minutes without turning too brown, then it is a good temperature. Fry the samosa for about 2 minutes. If you tap them with a fork and they are hard, and they have turned more golden, then they are done. While one is frying, you can make the next one.

Allow any excess oil drip out before eating. I made two types, the veg ones like described, and meat ones which are the same but with pork mince. I think they are best when still hot and crispy with sour yoghurt (i.e. a week past it’ sell by date, the perfect point of sour yet probably wont kill you just yet).

Very cold indeed and some bits and bobs

The cold

It has been somewhat cold recently here in the UK. Woke up today to find that I couldn’t see outside.

That is frost, but on the inside of the window. I am currently sleeping under two duvets and getting up is not pleasant experience.

Even what looks like condensation at the top of the window was completely frozen. Would be nice to have double glazing.

More fedora icing

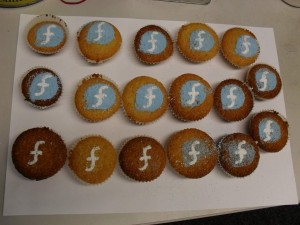
I forgot to post the sprinkled sugar cupcakes I made a few months ago for the release. These were made using a paper cut-out template and then dusted. I should have made more blue icing sugar. I found the best way to make it was using a small resealable plastic bag. Add the icing sugar and a little blue dye. Then squish the lumps with your fingers until it is dry and fine.

Take that GDM!

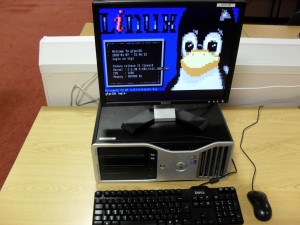
It is a shame, but at the university there is somewhat strong resistance to the concept of a graphical login. Here is what the students see when they come to log into a machine. It will look even more silly on high resolution monitors with KMS graphics where the ASCII art occupies a small section in the upper left.

Christmas meal

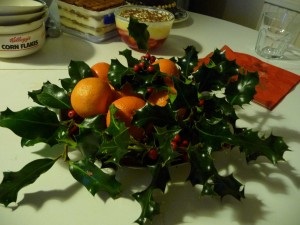
Asked Andrew to bring his camera, but was so busy cooking that I forgot to ask him to take photos of the food. As usual, the starters were the easiest part of the meal to make, and the part most people liked (Bruschetta and other things on toasted breads). Here is the holly I nicked from someone’s overgrown hedge (no damage done, I promise).

I was quite impressed with this years Christmas beard that I grew. Looking forward to Jan 1st to shave it all off though, it is very annoying now.

Here is Basab and Luis in the background. There were just 6 of us this year, about a third of what we had last year.

Christmas meal preparation

Sainsbury’s and Ice

I felt a little bit cheated by Sainsbury’s yesterday. On one of my visits, I received a voucher which doubles the nectar points on one visit before Christmas day. So I got a lift from Sooty in her car to the place, spent £112.49 on food shopping, handed over the point doubler voucher, left grinning at having pulled one over Mr Sainsbury by using it on a massive shopping spree. Then sat down and realised that that saved me barely over a pound. That was dumb, should have gone to Aldi like I normally do, I thought. Normally I wait for Sooty to go home for Christmas, then I do about four trips to Aldi/Lidl with a massive backpack and bags. But then today I went back to the shops to pick up some things I forgot. The walk was the most stressful thing for years. The paths were so icy that I was completely exhausted by the time I got there, having nearly died several times, never-mind walking back with full bags.

Desserts

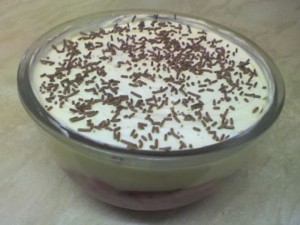
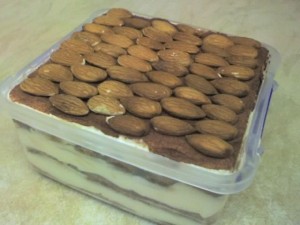
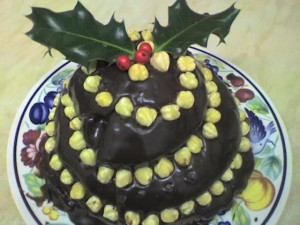
I have now finished the desserts. This year’s plan is to have all the desserts pre-made as by that point in the evening I have alcohol induced clumsiness.  This year’s desserts are (sorry about the quality of the pictures, I left my camera at work, so these are from a phone):

Trifle, standard affair, with fruit in the jelly but no sherry.

Tiramisù, made with camp coffee and dark rum. Very easy to make especially in the Tupperware box which makes storage simple (so little space in the fridge).

And finally a “chocolate cola cake”. This is your standard four layer chocolate cake affair, but it contains cola (sugar based one to be safe) . I tried some crumbs earlier and it does have some interesting unexplainable taste. Will have to wait till tomorrow for a proper try.

More pictures of other noms tomorrow.

Plymouth theming guide (part 4)

This the final part of the theming guide. As I mentioned in the last post, you already know everything you need to write your themes. In this post I will show a couple themes I wrote to explore the system and some fancy high level aspects of the scripting language. You don’t need to know these, they are just a cute method to solve a problem that others may find useful.

Themes

To install these themes, extract them to /usr/share/plymouth/themes and run the appropriate plymouth-set-default-theme line.

Vizta

A very simple theme matching what the Vista theme does. It has just 30 lines of custom code.

http://brej.org/blog/wp-content/uploads/2009/12/vizta

source

Dandelion

This theme has the target of stressing the system. A couple months ago it was running at about 3 fps, now my machine hits 30 fps and spends some time idle.

http://brej.org/blog/wp-content/uploads/2009/12/dandelion

source

Inheritance

When I first proposed doing a scripting system Ray said “If you do this, I guess I’d recommend you keep it very simple”. I agreed, so what I aimed to do was to implement all the features with the minimum space. The solution I came up was to kill several birds with one stone. The stone being an inheritance system.

The important operation for inheritance is the single bar (“|“), inherit operator. Think of it as a very lazy OR function. As an example take the statement:

A = B | C;

This creates a new object (A) which is an inheritance of B and C. A now gains all the properties of B and, as a fall-back, C. There are three ways of using inheritance objects.

Direct

Consider the following statement:

A = "Seven" | 7;
B = String(A).CharAt(2);
C = 80 + A;

So A is an inheritance of the string “Seven” and the number 7. This means when in situations where a string is preferred, it will act as a string, and when the a number is preferred, it will act as a number. The value in B will be the third character in the string (“v”), and the value in C will be the number 87.

This kind of inheritance is used to allow native C objects (images, sprites etc.) to be able to be used as hashes to find appropriate functions to call. An object is created which inherits from the native object and the object template hash (which holds all the functions). The constructor function is also connected to the template using an inheritance. Thus you can treat it as a function, or as a hash of functions and it will adopt the appropriate behaviour.

text_image = Image.Text("string"); # Treat Image as a hash
png_image = Image("filename.png"); # Treat Image as a function

Hashed

Hashes are the main containers in the system. When an object inherits from two hashes, accessing the inner elements will trigger a crawl through all hashes for that element.

A.a = "a";
A.b = "b";   # A: a="a", b="b"
B.b = "B";
B.c = "C";   # B: b="B", c="c"
C = A | B;   # C: a="a", b="b", c="c"

When accessing the elements within C, the system looks within A, then B (also within any object they inherit from). Thus, elements within B can be overridden by A. This is very much like the __proto__ in Mozilla JavaScript.

Functional

Just like hashes, when functions are inherited, the system goes through them in the inheritance sequence, executing each one and moving onto the next if it has failed.

Fib = fun (v) {if (v <= 2) return 1; else fail;}
    | fun (v) {if (FibCache[v]) return FibCache[v]; else fail;}
    | fun (v) {return FibCache[v] = Fib(v-1) + Fib(v-2);};

If you have ever programmed the ML languages, you will already be somewhat familiar with this. In those, you can put constants in the function variable decelerations and functions which do not match these to the passed parameters, fail. Here, at any point in the function, you can choose to fail. The system then tries to execute the next function in the inheritance.

Plymouth theming guide (part 3)

Now the basics have been covered in part 2 of this guide, we can now tackle some more advanced tasks. This part is for beginners to intermediate. If you have never programmed, then this will be a rough introduction to the field and thus you may need to ask for help about some confusing aspects.

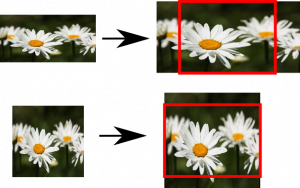
Until now, all the examples have been simple assignments and there hasn’t been much “programming”. At the end of the last part, the background image needed to be scaled without distorting the aspect ratio. If the image is wider than the screen, then the image needs to be scaled up to the height of the screen and let the sides hang over the edges. If the image is taller than the screen, the image should be scaled to the screen width and allow the top and bottom to go beyond the edge of the screen.

scale_ratio

You can get the screen ratio using the Window.GetWidth and Window.GetHeight functions introduced in the previous part. The ratio is height to width. The greater the number, the taller the proportions.

screen_ratio = Window.GetHeight() / Window.GetWidth();

GetWidth and GetHeight functions also work on images.

flower_image_ratio = flower_image.GetHeight() / flower_image.GetWidth();

To create the scaled image, the scale factor needs to be determined. If the screen is tall, we make the scale factor such that the image will be the same hight as the screen, and allow it to dangle off the edges. For a wide screen, make the image match the width and allow the top and bottom to go beyond the edges. The scale factor can then be used to scale the image width and height.

if (screen_ratio > flower_image_ratio)
  {  # Screen ratio is taller than image ratio, we will match the screen height
     scale_factor =  Window.GetHeight() / flower_image.GetHeight();
  }
else
  {  # Screen ratio is wider than image ratio, we will match the screen width
     scale_factor =  Window.GetWidth() / flower_image.GetWidth();
  }
scaled_flower_image = flower_image.Scale(flower_image.GetWidth()  * scale_factor,
                                         flower_image.GetHeight() * scale_factor);
flower_sprite = Sprite(scaled_flower_image); # Create the a sprite using the scaled image

Now the image is scaled to the correct width and height, it needs to be placed in the centre of the screen.

flower_sprite.SetX(Window.GetWidth()  / 2 - scaled_flower_image.GetWidth()  / 2); # Place in the centre 
flower_sprite.SetY(Window.GetHeight() / 2 - scaled_flower_image.GetHeight() / 2);
flower_sprite.SetZ(-10000); # Place right at the back

mytheme_placed

If everything went right, your code should look like this:

flower_image = Image("flower.png");

screen_ratio = Window.GetHeight() / Window.GetWidth();
flower_image_ratio = flower_image.GetHeight() / flower_image.GetWidth();

if (screen_ratio > flower_image_ratio)
  {  # Screen ratio is taller than image ratio, we will match the screen height
     scale_factor =  Window.GetHeight() / flower_image.GetHeight();
  }
else
  {  # Screen ratio is wider than image ratio, we will match the screen width
     scale_factor =  Window.GetWidth() / flower_image.GetWidth();
  }

scaled_flower_image = flower_image.Scale(flower_image.GetWidth()  * scale_factor,
                                         flower_image.GetHeight() * scale_factor);
flower_sprite = Sprite(scaled_flower_image); # Create the a sprite using the scaled image

flower_sprite.SetX(Window.GetWidth()  / 2 - scaled_flower_image.GetWidth () / 2); # Place in the centre
flower_sprite.SetY(Window.GetHeight() / 2 - scaled_flower_image.GetHeight() / 2);
flower_sprite.SetZ(-10000); # Place right at the back

If you wish for your background to match the one in your desktop, copy it to the theme directory and edit the script to load the image of that filename. Only PNG files are allowed.

mytheme_constantine

Finally to install your theme into the ramdisk, so it is loaded when your computer starts, add –rebuild-initrd to the plymouth-set-default-theme command. Do be careful not to install a theme which deadlocks. Make sure you have a backup kernel or initrd image if all goes wrong

plymouth-set-default-theme mytheme --rebuild-initrd

Animation

Start by making a new sprite with an image of a butterfly:

butterfly_image = Image("butterfly0.png");
butterfly_sprite = Sprite(butterfly_image);

animation_step1

At the bottom of the block of code you are editing, there is a function named refresh_callback. This is called 50 times a second (unless the system is busy) just before refreshing the screen. Within the function, you can move the sprites around and these movements will be updated on the screen. Take a look at this example:

progress = 0;
fun refresh_callback ()
  {
    progress++;
    butterfly_sprite.SetX(progress);
  }

animation_step2

At every refresh, the butterfly will be moved one pixel to the right. To make the butterfly flap it’s wings, several frames are needed. Instead just loading one image, this requires an array of images to be loaded. Replace the original two lines that loaded the butterfly image and created the sprite, with these:

for (i = 0; i < 4; i++)
  butterfly_images[i] = Image("butterfly" + i + ".png");
butterfly_sprite = Sprite();

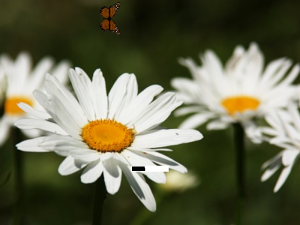
You can append strings to numbers to create the four filenames. Secondly, if a sprite has not been attached to an image, it will simply be empty until one is set. Adding the following line into therefresh_callback function should rotate through the 4 butterfly frames. Because the progress is divided by 6 in order to slow the animation to one frame every 6 refreshes, we use a Math library function to round down a number to an integer.

butterfly_sprite.SetImage(butterfly_images[Math.Int(progress / 6) % 4]);

animation_step3

There are some other math functions available, sin and cos are often useful. Replace the SetX line with the following to make the butterfly go around in a circle around the centre of the screen.

theta = progress / 100;
butterfly_sprite.SetX(Window.GetWidth() / 2 + Math.Sin(theta) * 200);
butterfly_sprite.SetY(Window.GetHeight() / 2 - Math.Cos(theta) * 200);

animation_step4

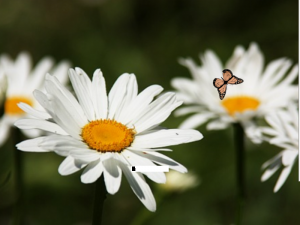
Now the butterfly looks a little weird pointing the wrong way as it is going around in a circle. We need to rotate the butterfly image so it is flying forward. Add .Rotate(theta) to the image while setting it to the sprite. This creates a new image which is rotated by the angle theta.

butterfly_sprite.SetImage(butterfly_images[Math.Int(progress / 5) % 4].Rotate(theta));

animation_step5

If you have reached this point, you should now have all the knowledge you need to start creating your own themes. For a full list of available functions and script syntax take a look at the freedesktop plymouth script wiki. Good luck, have fun and make some nice splash screens.

Plymouth theming guide (part 2)

The first part of guide showed how to set up the system to be able to view plymouth themes and make simple adjustments to ones that are already present. This part will show how to make a custom theme, without delving down to the level of writing C.

One of my targets for this year was to add a simple way of designing themes without having to worry about many low level aspects (redrawing parts of the screen, keeping pointers to all elements to free them etc). The scripting language allows the designer to get stuck into the design, while the system is already optimised to take care of and minimise the areas to be refreshed. It is now quite stable and this is the method used by Mandriva for their default themes.

The following walk-though will show you how to make a small example splash. This part should be very easy and even if you have never programmed before, you should have no problems. First download and install the template:

wget -O /tmp/mytheme.tar.gz http://brej.org/blog/wp-content/uploads/2009/12/mytheme.tar.gz
cd /usr/share/plymouth/themes/
tar xzf /tmp/mytheme.tar.gz

Now the theme is installed, and you already have a system set up like explained in part 1, you can switch to it:

plymouth-set-default-theme mytheme

and then test it:

plymouthd --debug --debug-file=/tmp/plymouth-debug-out ; plymouth --show-splash ; for ((I=0;I<10;I++)); do sleep 1 ; plymouth --update=event$I ; done ; plymouth --quit
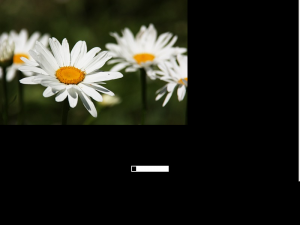
mytheme_template

Notice this time some debug information is generated and the file /tmp/plymouth-debug-out contains more. The debug information is useful to find any syntax errors in your script. It is a good idea to keep a text editor with this file open and revert to saved after every execution to watch for any errors. A syntax error contains the line and column number of the expression like so:

Parser error "/usr/share/plymouth/themes/mytheme/mytheme.script" L:8 C:42 : Expected ';' after an expression

In the mytheme directory there is a file named mytheme.script. Open this using your favourite text editor. At the top of the example script, there are some lines which create the theme, and below this are sections which control the password dialogue, progress bar etc. You should leave things below the dialogue line alone for now.

Lines starting with # are comments, so lets skip to the first two executed lines:

flower_image = Image("flower.png");
flower_sprite = Sprite(flower_image);

In the mytheme directory, you will notice some images. One of these is flower.png (from Nicu CC-BY-SA), which the first line loads. The loaded image is assigned to flower_image, which can then be used by sprites. A sprite is an image with a position on the screen. The second line creates a sprite using the flower image. By default this is placed at X=0, Y=0, which is the top left of the screen. To change the position of the sprite use the SetX and SetY functions on the sprite. Adding the following line will move the sprite to 100 pixels to the right.

flower_sprite.SetX(100);
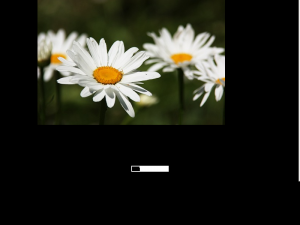
mytheme_setx

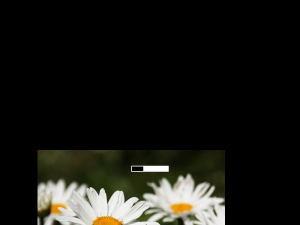
In a similar way, setting the Y position will move the image down the screen.

flower_sprite.SetY(400);
mytheme_sety

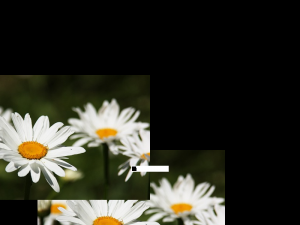
Notice there is no problem if the sprite runs off the edge of the screen. Also notice how the progress bar is on top of the flower sprite. The sprites have a defined order of which is on top. To demonstrate this, lets add another sprite. You can reuse the flower image and place it overlapping with the original flower sprite.

other_flower_sprite = Sprite(flower_image);
other_flower_sprite.SetX(-100);
other_flower_sprite.SetY(200);
mytheme_overlap

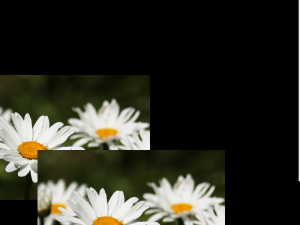
Negative coordinates are acceptable. The new sprite will be placed on top of the previous one. To override this, each sprite has a Z value. The higher the Z value, the higher up the stack the sprite is (drawn on top of others). To place the original flower sprite on top you set its Z value to be higher. The default Z value is 0, and you can set it using SetZ.

flower_sprite.SetZ(10);
mytheme_setz

Now not only is the original the sprite above the other, it is also above the progress bar, which also has the Z value set to 0. In general, wallpapers should have Z set to high negative values to force them to the very back and the password dialogue has a Z value of 10000 to place it on top of any theme components. Thus, make sure you don’t place any sprites higher than 10000, otherwise you may find it difficult to type in your password.

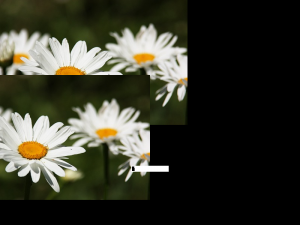
Lets take the sprite back to the background and reposition it. Often you want to set X, Y and Z at the same time. This can be done using the SetPosition function.

flower_sprite.SetPosition(0, 0, -10000);
mytheme_setposition

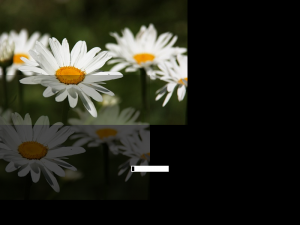
As well as the X, Y and Z values, the sprite also has opacity. The default setting of 1 makes the sprite solid. Values between 0 and 1 make the sprite partly transparent. This can be set using SetOpacity.

other_flower_sprite.SetOpacity(0.3);
mytheme_setopacity

Setting this to 0 will make the sprite invisible. This should return the display the original setup.

other_flower_sprite.SetOpacity(0);

mytheme_template

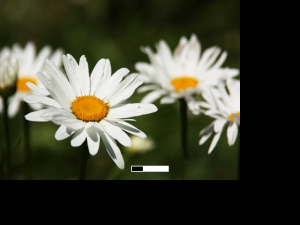
The image of the flowers is very nice, but it is the wrong shape and size. You could distribute an image for every possible screen resolution, but this would be terribly space consuming. Instead you can scale the image to suit your needs. A new scaled image can be created using Scale and to change the image the sprite is showing, use SetImage.

resized_flower_image = flower_image.Scale(640, 480);
flower_sprite.SetImage(resized_flower_image);
mytheme_scale

Here the image is scaled to 640×480, but this is not the screen resolution. For now, assume there is only one monitor connected (I will explain more about this later). To get the width and height of the screen, use Window.GetWidth() and Window.GetHeight(). You can use these to scale the image to the screen dimensions.

screen_width = Window.GetWidth();
screen_height = Window.GetHeight();
resized_flower_image = flower_image.Scale(screen_width, screen_height);
flower_sprite.SetImage(resized_flower_image);

mytheme_fullscreen

Now the image is scaled to cover the whole screen, but is the wrong aspect ratio (although that is difficult to see in this example). Correcting this will require some programming which will be shown in the next part of the guide.
Plymouth theming guide (part 1)

Judging by the many forum postings and articles, many people do enjoy a nice boot splash and there is a real desire to customise their spin or even the individual machine to their preferred theme. In this guide I will try and show you how to make your own custom splash, walking though the process of viewing, changing and installing. Even if you are a Linux novice, you should be able to follow the steps without much trouble. This guide assumes a Fedora system, although there should be very few changes between the different installations.

Set-up

Obviously you can view plymouth running by turning on your computer, but that does get rather tiresome if you wish to test frequently. Without restarting your machine, there are three sensible methods of testing plymouth: using a  victim machine, using a virtual victim machine or using the X11 plugin.

Victim machine

This is the easiest method, although it does require a second physical machine to work with.

If you do not have a KMS compatible system, then you will need to add vga=0x318 to your kernel line. This pushes the console to a VESA graphical mode. The 0x318 actually stipulates 1024x768x32bit mode. To see all the modes and find one most suitable for you, add vga=askme and a list will appear (don’t forget the 0x).

SSH into the machine as root (yes you do need to be root). The splash will be tested on tty1, but tty1 has two problems: there is an X session running on it and if you quit that, getty will start and capture keyboard events. To turn off getty on tty1, edit /etc/event.d/tty1 an comment out all the start and stop lines with a hash.

#start on stopped rc2
#start on stopped rc3
#start on stopped rc4

#stop on runlevel 0
#stop on runlevel 1
#stop on runlevel 6

Then drop to init level 3, which kills X and brings you to an empty console, by running init 3. Now install all the themes you wish to try out:

yum install plymouth\*

This is how to do this in Fedora, you should know the way to do this in your distro already.

Virtual victim machine

The alternate to using a physical machine is to use a virtual one. Both VMWare and QEmu work very well. You will have to do an OS install on the virtual machine. These do not yet support KMS (support is coming soon apparently), so you will need to add the vga parameter on the kernel line. The setup is exactly the same as  one for a physical victim machine.

X11 plugin

This method allows you to execute plymouth within X. This is the preferred testing method BUT it can crash your X if you accidentally pick a text theme. It also does require you to compile your own version of plymouth to get the x11 renderer. As root get the latest git checkout:

git clone git://anongit.freedesktop.org/plymouth

Next configure and compile it:

> cd plymouth
> ./autogen.sh --prefix=/usr/ --with-system-root-install
> make
> make install

Now it is installed, make sure you have the DISPLAY set correctly so even if you run as root, it can connect to your X session and display the windows.

plymouth-x11

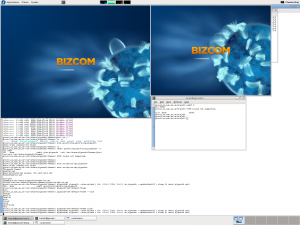
When you run it using the directions below, you will notice you get two screens which allows you to test the behaviour of a two monitor setup.

Viewing

Now you have the system set up, you can manually execute plymouth to examine a theme. First, as root, start the plymouth daemon (plymouthd lives in /sbin/ so make sure you have that in your path):

> plymouthd

Now it is executing, you can control it using the plymouth program. To show the splash run:

> plymouth --show-splash

This should display the splash.

plymouth_charge

To quit, execute

> plymouth quit

The splash should then quit and the terminal return to its text mode. You may have noticed the progress did not advance very quickly. The progress is estimated using events, based on the event arrival time of the previous boot. To show the splash for 10 seconds and watch the progress moving execute the following one-liner:

> plymouthd; plymouth --show-splash ; for ((I=0; I<10; I++)); do plymouth --update=test$I ; sleep 1; done; plymouth quit

There are several themes installed on your system. To get the full list run:

> plymouth-set-default-theme --list

To change to any of these themes replace –list with the theme name e.g.:

> plymouth-set-default-theme spinfinity

Now you can examine any theme you wish. But what if you don’t like any of them?

Theme editing

It is important to understand the difference between a theme and a plugin. A theme uses a plugin and stipulates some parameters the plugins uses. This information is stored in the directories under /usr/share/plymouth/themes/. Each directory has a .plymouth file which describes the theme, stating the plugin it uses and any parameters the plugin allows to be set. To create a new theme, simply copy an entire directory to a new name, rename the .plymouth file to the new name, and update its contents. In addion, you can now also change the images that your new custom theme uses.

This is sufficient if you wish to recycle one of the already present plugins. For more customisability you can write your own plugin in C which is, to be honest, not very easy. The much simpler alternative is to use the script plugin and write a script to describe the theme, and that is what I shall be describing in the next post.

For the hate of APE tags

APE tags are yet another method of tagging media files with metadata. Ever wondered how your MP3 player knows the title and the artist of a song? Well it is through the use of tags implanted within the file, making sure the player does not try to play the information. The three most popular MP3 tag types are:

  1. ID3v1 – the original tagging format form 1993 using a fixed field block with a title, artist and album. All in iso-8859-1, so you probably could still correctly spell Röyksopp and Sigur Rós, but you will have problems adding the artist 峰厚介 – 市川秀男 – 日野元彦 – 植松孝夫 – 池田芳夫 – 稲葉国光 playing track ジンジャーブレッド・ボーイ, both due to the characters used and the 30 character limit in each field.
  2. ID3v2 – came in 1998 with the solution of using flexible and definable fields and allowing the tag to be places at the start of the file. The flexibility allowed apps to keep any kind of information they liked within the file. Everything from the maximum volume of the track to album artwork.
  3. APE – was implemented in parallel with ID3v2 and solves the same issues and the format is even more versatile.

ID3v2 is the most common tag format in MP3 files “in the wild” and most taggers will add an ID3v1 tag from the ID3v2 tag data just to cover both bases. APE, although not as common due to its flexibility, is the preferred tag format in many applications. Rhythmbox for example looks for an APE tag, then an ID3v2 and at a last resort tries an ID3v1. The problem is that most Linux tagging tools, and players which allow you to edit the tags, only write ID3 tags. This creates a bizarre situation where you change the tag of a song in Rhythmbox, the value in the field changes, the ID3 tag is updated in the file, Rhythmbox notices an updated file, it re-reads the file APE tags, changes the field back to it’s original value.

How to kill APE tags?

This is something I have struggled over for several years. There are pieces of Linux software which can edit APE tags, but I found these get confused by the presence of an ID3 tag. For ages, I would remove the ID3 tag from a file, remove the APE tag, then re-insert the ID3 information. This was both clumsy and dangerous as my hacky shell scripts would often do disastrous things with tags that have escaping characters (If you are in a band, release a song named \” rm -Rf *; ).

The pain lasted until the other day, when I looked around and found py-ApeTag. Wow, it just works (that’s my favourite type of working). It removes the APE tags even when obscured by other tags and worked even in cases where I gave up trying to use other software to remove the tag and went by hand with hexedit to damaging the field names so they would not conflict. Applied it to my entire music collection without a single fault. Thank you Jeremy Evans!

How to use

To install, as root, download my altered version of the py-ApeTag module to some bin directory and make it executable.

su
wget http://brej.org/blog/wp-content/uploads/2009/11/ApeTag -O/usr/bin/ApeTag
chmod a+x /usr/bin/ApeTag

To run, execute ApeTag with the filenames of the files you wish to view the APE tag of.

ApeTag *.mp3

Now that you can see the tags, you can remove them. You can apply this to files with no tag and it will not touch them.

ApeTag --delete *.mp3

To apply to all files in your library.

find -name \*.mp3  -exec ApeTag {} \;