Utopiums are back

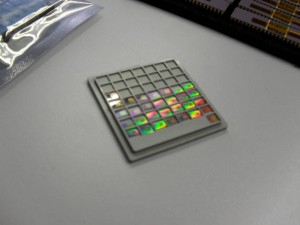
After months being manufactured, the Utopiums are back! I will explain more about what they are in another post, but for now here are some photos.

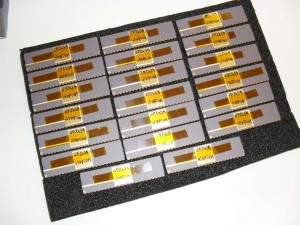
Here are the packaged chips (20 of).

They also send you the remaining unpackaged dies. These have an excellent ability of confusing the camera’s auto focus.

The full die is 5mm by 3mm.

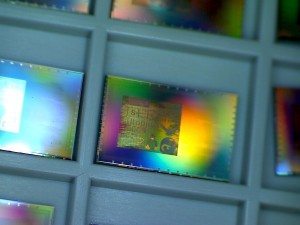
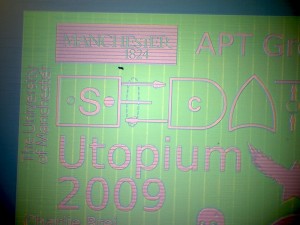
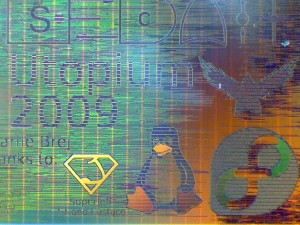
And this is what they look like under a microscope. They do get dirty very quickly when exposed to a dusty room.

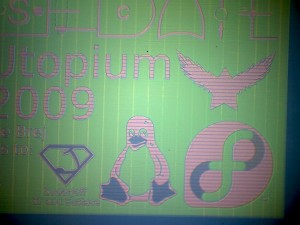
On the bottom right of the chip logo are the thank-yous. The Tux and the Fedora logo are about 0.5 mm tall (perhaps the smallest ever?). You can see the diffraction grating giving a nice secondary colour.

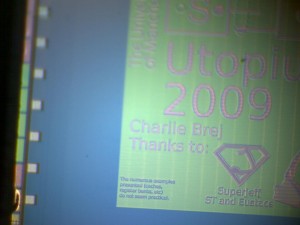
At different angles, they look very different.

And here is a wise comment left by the one of the Async symposium reviewers.

I am still testing the beast, but it does work. It has executed a number of programs and the wagging slices do become by-passable. The biggest worry was the reset as that is quite complicated, but it seems fine. I will open source the design and the tool set some time next month.

3M MPro150 Pocket Projector

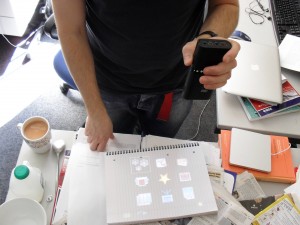
Andrew decided to buy himself a tiny 3M MPro150 projector.

It isn’t just a projector as it can directly display several media types. We tried PDF, Powerpoint, JPEGs and even an XVID video and all worked fine. The rendering of the PDFs was a little slow at points and it can overflow its memory if you supply something very heavy. The video worked fine and even played the audio on its speakers.

The tech specs are quite nice. Uses micro SD cards, although it also has 1GB on board. It can be connected to the PC using a mini USB socket and looks like two media storage drives (one on board and one for the mico SD), so no drivers needed. Only 640×480 but that’s fine for video and presentations. The 150 model can also be driven directly from over VGA or component cables (the 120 model is cheaper but can’t do this). And the on board battery apparently lasts about two hours which is enough to give a presentation or watch a movie.

It does have its ugly side though. At 15 lumens, it really isn’t very bright. In a normal room, you will be able to watch videos, but editing text is a lot more difficult. I’m not sure there are many situations where you want a tiny projector, yet have full control over the lights. Secondly it has a fan. It’s not that noisy, but I have an epic hatred of moving parts. And finally there is the price-tag of £350.

So, yeah it is pricey and probably not that practical, but it is just a bit of fun.

Falling blocks game in Plymouth

So, you have sat down at your computer and you’re waiting for it to boot, then suddenly you realise that it is doing a full fsck which is going to take a few minutes. What to do. You have two options:

  1. Sit quietly watching the little bar move slowly across
  2. Plymouth falling blocks game!

This is not a serious proposal, I just wanted to exercise the scripting system to see if I could find any bugs, but if you want to have a play with it, the script is available.

Uncapping a Pentium Pro

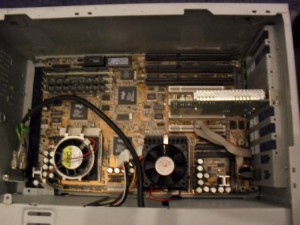
The Pentium Pro is probably the greatest chip ever. Architecturally, Pentium 2 and 3 were just tweaks of the Pentium Pro awesomeness. For years I kept an old machine I worshipped and adored, which was a dual Pentium Pro in an old AT case. Last weekend I decided to throw away a lot of the junk that had accumulated over the years and the computer had to go.

I chucked the case and kept the CPUs. Coinsidently, it is a really bad idea to look on ebay for something you threw away a week earlier. Learning that you just threw away a $200 motherboard is enraging.

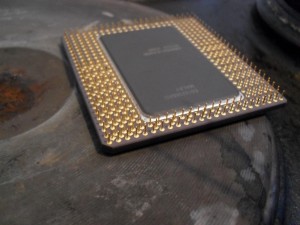
They look beautiful although it makes me wonder how well the heat sinking was working on one of them. Wasn’t as big an issue back then.

#

Getting their tops off

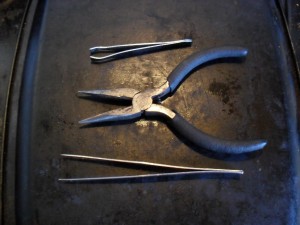
Here are the tools needed. Small pliers for holding the chip in place and a pair of tweezers. The ones at the top are lady’s tweezers, and the bottom ones are ones that came with an electronics toolbox. The electronics ones make it easier to lift off the lid, while the lady ones give you more control when holding the lid so it doesn’t twist and fall back down onto the exposed silicon. You will also need a cooling tray that you don’t mind dripping molten solder onto (here an upside down old baking tray).

When heating random substances  you find around the house, there is a good chance you will release some toxic fumes. Use a mask, keep the room ventilated. Some chips are stuck down with glue which is rather nasty when heated. You won’t get these open simply by heating and you will end up releasing loads of Cyanoacrylate fumes around your kitchen (bad thing).

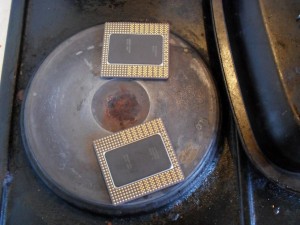
So, lets get cooking. Place the chips directly on the hot plate. Turn up the heat.

Keep prodding the lid until you notice the solder has melted. The solder will not change visibly, so you have to actually prod it to see. In the photo below, the solder is liquid, but it is impossible to tell.

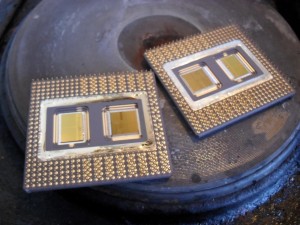
The lids are now stuck down with surface tension. Im most chips, you can simply slide the lid over a little and it will become easy to lift off. Here the pins are too close to the edge of the lid, so the pointy tweezers are needed pick the lid off. (Note to self: clean cooker)

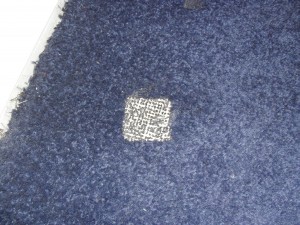
After this is done, lift using the pliers onto the cooling rack and leave there for more than 15 minutes. These take a very long time to cool down. A couple years ago, I was removing the lids of several chips and I run out of space so I decided to move the cooling tray to the other room. When one of these slides off onto the carpeted floor, this is what it does. Yeah, don’t be doing that, just leave them.

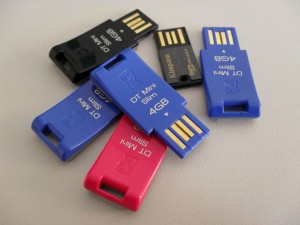
Fedora on USB sticks

I ordered some USB sticks to give away to the better students to encourage them to contribute to open source software. The idea is that they can run their own installation where they can install development libraries etc. I’ll write more about this in a few weeks when I know how successful this has been.

Installing Fedora on the disks is relatively easy. Nowadays I install computers using a USB drive, by simply DDing the iso directly to the device.

dd if=Fedora-12-i686-Live.iso of=/dev/sdb

The target USB stick will look just like any other hard drive. You just have to make sure you install the bootloader onto the target stick by overriding the BIOS boot order in the grub installation screen.

Once installed, I didn’t want to actually boot the device as I wanted the students to go through the first boot process of setting up a their own user. But I wanted to install some development packages and do a full system update. This can be done by mounting the device, chrooting and running yum commands. The live image has a /mnt/sysimage which is already set up to do something like this by already having /proc and /dev correctly set up.

mount /dev/sdb1 /mnt/sysimage
chroot /mnt/sysimage

The biggest issue with running from USB sticks is that they have no on device cache, thus each fsync command takes absolutely ages. Yum, correctly, makes heavy use of fsync to make sure it leaves the system in a sensible state even if interrupted. To speed things up I tried libeatmydata, which worked surprisingly well. I updated the installation several times faster. LibEatMyData is named thusly because of it’s real ability to screw things up royally, but in this situation if anything went wrong, I could just restart. Maybe some yum devels could mention if this is outright dangerous, or a fairly safe trick if you can guarantee no interruptions.

Of cause at this point I only have one stick installed, and making six this way is out down right boring. So long as the other disks are the same size (or larger), you can clone the disks from one to another. You need a bit of storage space so best to do this from another machine.

dd if=/dev/sdb of=master_image
dd if=master_image if=/dev/sdc
dd if=master_image if=/dev/sdd
dd if=master_image if=/dev/sde
...

Watch out though if you use this method, all the partitions will gain the same UUID, which will confuse the system when more than one is plugged into a single machine.

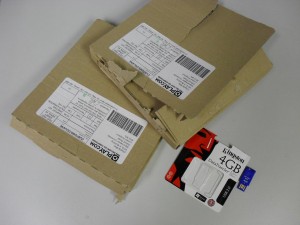
The postage costs are annoying so I went with play.com, who offer free postage (which is nice). What was ridiculous is that they post each item in a separate box which is way too big. For a tiny piece of plastic, there is a Kingston presentation box, each placed in its own massive cardboard box and posted separately. I hear this is because they have some kind of tax loophole where parcels of value below some threshold are not taxed.

The entire CS department has be refitted with awful Dell machines which have some screwy USB chipsets which allow booting off a memory stick only from the back ports on some manufacturers. I did something really stupid by accidentally mentioning to duty-office that it was possible to boot the departmental machines off a USB device. Now they are now going to go through and disable this feature (Grrr).

Utopium test board

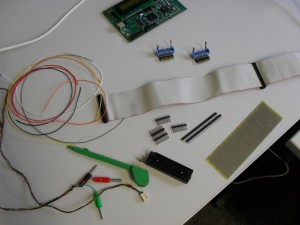
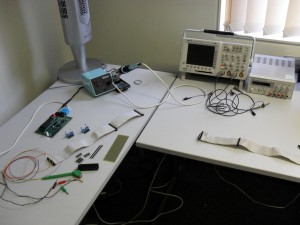
I was expecting the Utopium to come back any minute now, but it appears when the fab says 11 to 12 weeks, they don’t mean from the tape-out date, they mean from some other date a month after (Grrrr). As I was expecting it this week, I made a board that it can sit in. If it works I will make a proper PCB with connections to peripherals, but in the mean time what I need is a platform from which I can observe and control every pin on the chip. Here are the ingredients.

This used to be Matt’s desk but it has been converted into my hardware geekery desk. The scope is a fantastically expensive one that I am currently using as a voltmeter.

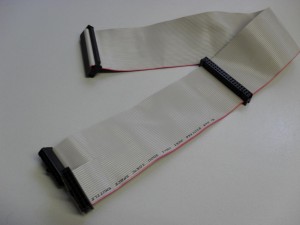
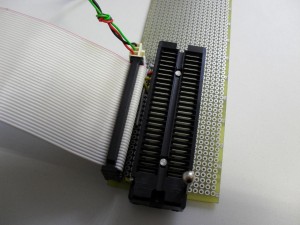
First job was making a cable. The I have plenty of these IDE cables around. Splitting it into two and clipping some connectors, I now have 40 way to two 20 ways that fit into Jim’s lab board.

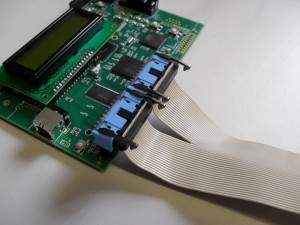
This is version 3 of the Jim’s lab board. The first one was back in 1999 when I started writing KMD. These boards have a default FPGA configuration which memory maps the I/O pins. This is ideal if you don’t to get into FPGA development just to get something simple going. Everything can be controlled from software running on the ARM.

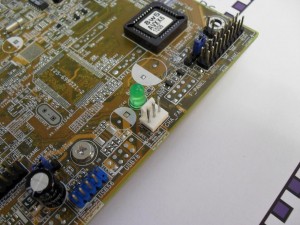
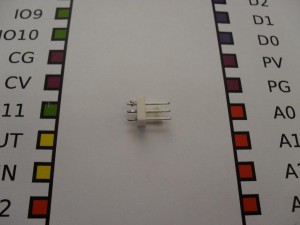
I’m sure we probably have may of these three pin connectors in the electronics cabinets, but since I had an old broken motherboard on the desk, I thought this was easier.

The solder used on motherboards has a much higher melting point which can be annoying when removing larger though board components, but this wasn’t that bad. For large components I recommend placing the board onto an electric kitchen hob hotplate, then after a minute, turning it over and hitting to make all the parts fall out (ventilated room and a mask is probably in order here).

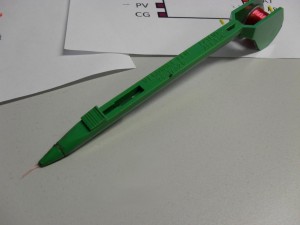
For signal wiring I use a Vero pen. These are fantastic. They are very thin, insulated wires which you wrap a couple times around the connected pins, then use solder to melt off the insulation. The insulation makes the solder point a bit dirty, but meh, they’re connected. Just dont show it to engineers, they suck their teeth and explain how they wouldn’t do it that way and start sentences with the words “Back in my day…”.

The danger of the Vero wire is that you can get it too hot while soldering a point near it and form a connection. The power connections were made using thicker wire.

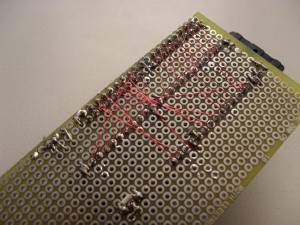
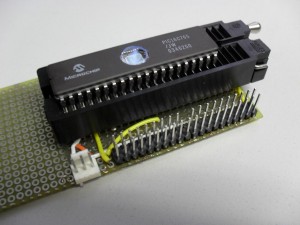
And nearly one hundred solder points later we have a simple board. The ZIF socket is for a 48 pin DIL. These look weirdly long, as will the Utopium, when it comes back.

Happily connected to the Jim board, and tested for any shorted connections. I did this by flipping the I/O pins about. If you get values stuck half way between the rails, then something is shorted. This happened to me, but luckily the FPGA was quite robust to short connections and it worked fine after correcting it.

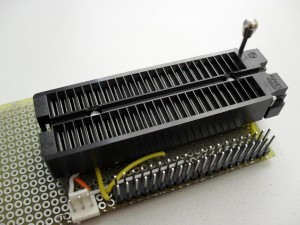
Here is a PIC in the socket. You can see how much longer the Utopium will be.

Well, one month left until she comes back. Can’t wait.

Napoleon Dynamplifier

I changed the motherboard of my PC a few weeks ago and one problem I have is that the audio line out signal is not amplified. I have this connected to a pair of massive 4 Ohm HiFi speakers which I found in one of the flats I rented. The speakers are not amplified, which is quite annoying as at maximum volume they are still very quiet. The previous board had a software controlled switch to flip the line out to speaker out. The speakers come with speaker wire leads, which I just twisted to the exposed wires from an old broken pair of headphones (a proper there, I fixed it job). Every so often I would crawl under the desk to re-twist them when I accidentally kick them free.

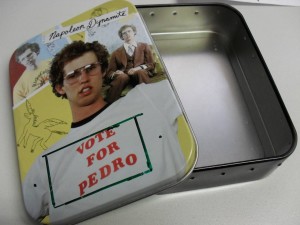
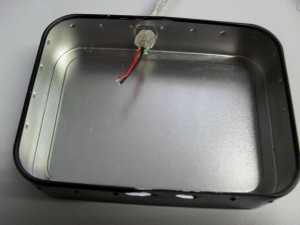
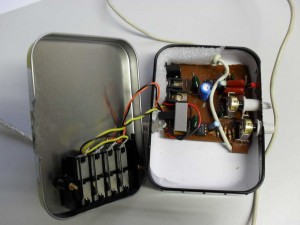
So making a small amp would fix two problems in one go. I was looking around the office for a nice box and here is one I found.

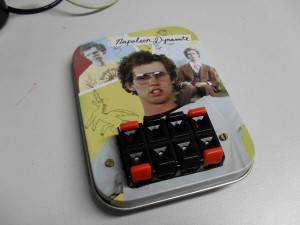
Sorry Pedro, but this amp is more important than your election. I was planning on stabbing a hole though the metal, but Dave insisted that stabbing things is not allowed due to health and safety rules. Instead he drilled the holes I needed.

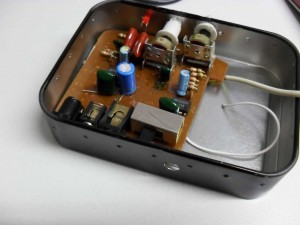
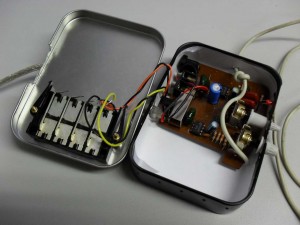
The circuit is an amp from a a small computer speaker set I had. It is based on two KA2209 chips. I could have made my own, but this one was perfect.  These can take quite a bit of punishment. They work from 3V to 15V and use very little power. At 5 volts the board was drawing 30mA. At one point I wired the power and ground the wrong way and the ICs pulled 3 amps, getting incredibly hot in the process. After I corrected the power I was quite surprised to find no damage was done.

The holes were relatively easy to expand by rotating a pair of pointed  tipped pliers inside.

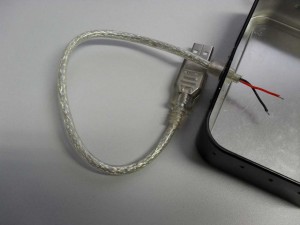
For power I used a USB cable I had from a broken PS/2 to USB converter. USB should give you 100mA without asking, and here we are well within this limit. Most hubs will give the maximum 500mA without any negotiation.

I could only find an eight port spring clip speaker wire connector block. Maybe I will expand it to an 4 speaker system later.

The metal case is not ideal as you have to insulate it from the board, here done with a piece of paper. I forgot to ask Dave to drill a hole for the audio cable, and I fancied using my stabbing approach without telling him. The method I used was taking a drawing pin and, using my thumb, pushing it through the metal sheet. It actually worked. It is a weird feeling being able to push one metal though another. That’s what it must be like to be a Terminator. You can then expand the hole with a cross head screwdriver.

A bit of foam to wedge the board in place and stop it from moving (it was coincidence that it was such a close fit).

The USB cable is a little short but that can be fixed with a USB extension lead (plenty around).  I’m now gonna use it for whatever I wanna use it for! GOSH!

Updating your BIOS without Windows or a USB stick

On some of the new lab machines I made, I noticed the CPU clock did not drop when idle. This is usually due to a motherboard not having support for a new CPU, and can be fixed by doing a BIOS update. The really old way of doing this using a floppy disk. This really is not an option, but writing a CD or a USB stick can be as much hassle. Here is a dead easy set of steps to update your BIOS on a Fedora system. The following should be done as root.

yum install syslinux
cp /usr/share/syslinux/memdisk /boot/
wget -O /boot/floppy.img.gz http://www.fdos.org/bootdisks/autogen/FDSTD.288.gz
gunzip /boot/floppy.img.gz

Now edit /etc/grub.conf and add the following lines at the bottom

title Floppy Image
    root (hd0,0)            # Or whatever the other entries use
    kernel /boot/memdisk
    initrd /boot/floppy.img

Of cause the floppy image does not yet contain the flash program or data. To get these you will need to look up your motherboard at the manufacturers website and click on support. Then find the latest BIOS data file. These will be either in a ZIP or an archive EXE. If it is an EXE then usualy you can extract their content without having to resort to Windows. Try using unzip, unrar (available from RPMFusion) and 7za (available in the p7zip package). Gigabyte for example use both rar and 7zip based executables. Once you have extracted it, you should have a flash file (the file extensions on these are completely random) and a flashing program (something like FLASHSPI.EXE or AWDFLASH.EXE). To copy these to the floppy image execute the following:

mkdir /mnt/floppyimage
mount -o loop /boot/floppy.img /mnt/floppyimage
cp {your flash and executable files} /mnt/floppyimage/
umount /mnt/floppyimage/

What you have now is a FreeDOS floppy disk image which can be booted by selecting it in the grub boot menu. Remember the grub menu is now hidden, so keep any key pressed during the boot reach it. Once it has booted (you can press F5 to bypass executing autoexec.bat) simply run the program as instructed by the motherboar website:

flashprog.exe flashfile.123

Happy flashing!

Will’s TV box

Will and Sophie got married last April and the gift list they had was, lets say “disagreeable” (a £30 gravy boat is silly). Luckily Sooty and I had a policy of giving gifts on the first anniversary (should they last that long). I wanted for years to make Will a TV/server box, so this seemed like the perfect opportunity.

Ebuyer had the MSI Media Live bare-bone systems for £120 which is reasonable for a sleek case. Andrew bought one of these a couple months earlier, when I pointed them out, and he had no problems. There were also positive reports about these by MythTV users.

The Athlon X2 issue

Here there was a bit of pain. I ordered an AMD Athlon 5000+ to go into it (it was on the supported CPU list). I plugged it in, and no response. So I take the whole machine to Andrew’s house, try the 5000 in his machine and again nothing, while his 4400 works in mine. Grrrr I think, borked CPU. Got an RMA, CPU was picked up, a replacement arrives a week later. Exactly the same problem. Then I start reading into this more.

Apparently there are two CPUs which have the exact same name (AMD Athlon 5000+ AM2). The newer version is in fact a low end Phenom based CPU which has two cores disabled. This is the only Phenom based chip which goes under the name Athlon X2, so had I picked any other chip in that range, I would have been fine. Most new boards will support Phenoms, but this one does not (even witha BIOS update). So I ordered a 5400 and kept the 5000 to upgrade my own machine (a painfully slow Athlon 1700). On the positive side, that part can be overclocked rather well and one of the cores can be unlocked with a good motherboard.

The machine

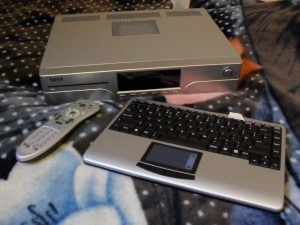
The actual box is fine, nothing amazing, but just works. The other parts were: a 1.5TB Samsung F2 disk (I didn’t test the speed but the F3 we have in the office is incredible), 2GB of RAM, a Hauppauge dual DVB-T receiver and the KeySonic wireless keyboard/touch-pad. The keyboard was so good, Andrew decided to buy one for himself to replace the Apple bluetooth keyboard and mouse he was using until that point. Its nice to see the Linux bluetooth support is very smooth. The other day Will took over an hour to bind his new Apple mouse with his Mac laptop. In the mean time I managed to sense the device from the other end of the room and bind with it within seconds.

As an always on machine, it is important to look at the power consumption. The rule of thumb is 1Watt is £1 per year (more like a $1 at the moment). This makes it easy to calculate how much you will save should you go for a lower power part. The TPD (Thermal Design Point) is roughly double to triple the average power consumption. The second thing to look for is the clock scaling. The 5000 I took for my machine scales from 2.2GHz, down to 800MHz (where it spends most of it’s time). This is a very good range compared to my Core2, at work, which scales from 3GHz to 2GHz. The added advantage of having a low power system, is the fans will rarely spin up to their higher speed. Andrew’s machine, which is practically identical, pulls 63W when idle.

The on board video card has a HDMI output, which is connected to the digital audio on the sound card. This is quite common nowadays in on-board cards, but I have also seen ATI cards which have a digital only sound chip on the card for HDMI audio. One shame is that MythTV doesn’t play well with pulseaudio and likes to grab the digital ALSA output. Apparently this is annoying when you want to pause TV and play a YouTube video. I recommend ignoring the digital output as that connects to the television and thatwill probably have awful speakers. Instead use the 7.1 analogue audio system already in the machine and attach it to some reasonable speakers.
Fedora and MythTV

Fedora was happily running on the machine detecting all the devices (although the DVB card requires some extra firmware which is well documented). MythTV has improved in the setup area greatly and installing the Rpmfusion MythTV packages did practically all the work for me. The first TV box I made for myself took about three days to get properly going. The remote was fairly easy too as the new remote control configuration tool works reasonably well and saves you having to search for the appropriate set-up file. One down side of the remote is the ugly windows logo on the middle button. This is easy to change using a torx head screwdriver and a plastic spudger. Andrew has a Fedora logo one, and Will’s one has a Tux.

For a machine that is only used to record and watch TV, 1GB is usually enough, but since the machine will be on all the time it can also be used as a server. On mine I run MySQL, DHCPd, DNS, MLDonkey, Apache, Ping proxy, DNS proxy, Squid (with passive redirection) and a VNC desktop I can log into. Will additionally has a DAAP server and VMware Widnows session just to run something called SoulSeek.  These can chew though another GB.

So far it has been 4 weeks since they started using the machine. No major complaints yet apart from the DVD menu system being a bit poor (I recommend you don’t play DVDs and just rip them to the hard disk). The statistics of my machine are a testament to how useful it is (Number of shows: 1436,  Number of episodes: 11218).
A couple cute Linux games

I spent Christmas writing lectures and I thought I deserved a little break. As a reward I had a brief look though some commercial games available on Linux. I am not all that keen to support closed source development, but the game side of the open source world is sadly relatively weak, and I am pro supporting publishers who develop with Linux in mind. Traditionally, closed source games were a pain to install and would break after updating the kernel or libc (as I found recently when trying to play some). This seems no longer the case. I have gone though maybe 20 demos and all worked out the box on Fedora 12. Here are the two that really stood out.
Machinarium

This is a game by Amanita Design who have been making some fantastic things with flash for years now. One of the best things I have seen from them is a very short game they made for The Polyphonic Spree (who are amazing in their own right) where it became a different way to experience their album.

Machinarium is a much longer and fuller game with vast amounts of detail. You play as a cute little robot who has been discarded in a pile of junk.

The scenery of every screen is fantastically detailed with layered moving foregrounds and animated background characters.

The body of the game is a puzzle adventure. These are often frustrating as you spend hours of your time trying to rub every object against every other object to make anything happen. The puzzles here are, on the whole, rather logical. You rarely have more than four items in your inventory and the game has a fantastic hint system. There are two types of hints, the hint icon simply repeats the obvious stuff you should have noticed. The second hint system gives you a cheat sheet for that screen, only if you pass a level of a mini game. The mini-game is a last resort thing but the cheat sheet is a hand drawn scribble notes explaining the solution in an incredibly cute way. When the robot gets a bit bored he starts day dreaming, giving a short entertaining animation.

Having said that, there were some weird dead ends I ended up getting into. At one point, I needed an oil drum which was offered in a shop. The shop owner asked for moeny, so I spent ages wondering around looking for sources of cash. The actual solution (SPOILER ALERT: of throwing a swarm of flies into his eyes and stealing the drum) was somewhat bizarre.

For $20 (£12.40 in the UK) you get about 4 hours of game-play. If you like this game, you should also try Samorost (Free) and Samorost 2 ($5).

Aquaria

This is not the first time I played Aquaria. It was an addiction of mine a couple years ago, before I removed my Windows installation. This is one of the most engrossing games I have ever played. On the face of it, you basically swim around and solve the mystery Aquiaria. The game is part puzzle mystery, part atmospheric escapism and part arcade shoot-em-up and one of my favourite games of all time.

The swimming comes very naturally and it is a pleasurable experience just to have a bit of a swim though the environment. As the game progresses, you attain more powers, which open up more of the vast map to explore. Unfortunately this was ruined somewhat by one of the final powers, the power to get a boyfriend. I liked Niaja (the main character in the game), she is strong, determined and has kick ass moves. Yet then she falls in love with the most pathetic guy who follows her around, occasionally throwing a fire bolt at some harmless fish and uselessly getting stuck flapping around on every piece of rock you go past. Then he manages to get himself captured and I could never get past the final boss to free him. This is possibly because I suspected the final scene would be them swimming hand in hand towards the sunset while I was screaming at the monitor “NOOOOOOO! You can do so much better! He is not the only fishman in the sea!” (well actually he is, but that’s not the point).

So, as I mentioned earlier, the game can be very hard at points. This can frustrate you if you can’t get past some stage. The second issue is the enormity of the map. The game is sandboxish, which allows you a bit of freedom to the order in which you attain your powers. On the other hand, you can spend quite a while swimming around looking for areas you have not explored.

It is a shame that many people will snub this game for it’s girly overtones. Cookery and collecting recipes features heavily which I found a bit bizarre at first become compelling after a while as you collect ingredients to attain special temporary attributes. I was completely trapped by this game for weeks and enjoyed it immensely.

Aquaria still has not been released for Linux, but the beta has. The free beta version is of the full game with no restrictions (although the site says this is only until mid February 2010), and I have not seen any bugs yet. There is a solid month worth of game-play here and even when the game becomes final, it is easily worth the £13.54 that the Windows and MacOS versions are selling for. I should also mention that the game does use a lot of open source elements. There is a heavy use of ogg/png and the lua scripting language.